Thursday 4 December 2014

Getting Started - Installing Git

Installing Git

Before you start using Git, you have to make it available on your computer. Even if it’s already installed, it’s probably a good idea to update to the latest version. You can either install it as a package or via another installer, or download the source code and compile it yourself.
This book was written using Git version 2.0.0. Though most of the commands we use should work even in ancient versions of Git, some of them might not or might act slightly differently if you’re using an older version. Since Git is quite excellent at preserving backwards compatibility, any version after 2.0 should work just fine.

Installing on Linux

If you want to install Git on Linux via a binary installer, you can generally do so through the basic package-management tool that comes with your distribution. If you’re on Fedora for example, you can use yum:
$ yum install git
If you’re on a Debian-based distribution like Ubuntu, try apt-get:
$ apt-get install git
For more options, there are instructions for installing on several different Unix flavors on the Git website, at http://git-scm.com/download/linux.

Installing on Mac

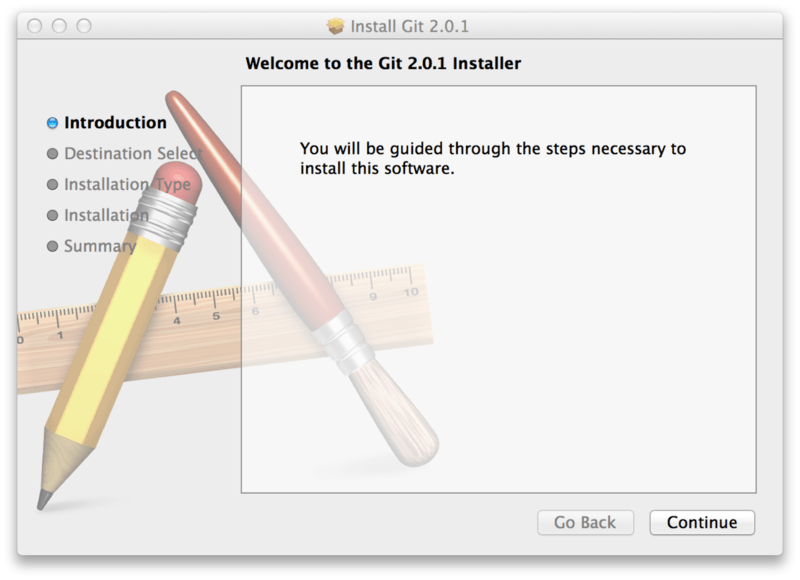
There are several ways to install Git on a Mac. The easiest is probably to install the Xcode Command Line Tools. On Mavericks (10.9) or above you can do this simply by trying to run git from the Terminal the very first time. If you don’t have it installed already, it will prompt you to install it.
If you want a more up to date version, you can also install it via a binary installer. An OSX Git installer is maintained and available for download at the Git website, at http://git-scm.com/download/mac.
Git OS X installer.
Git OS X Installer.
You can also install it as part of the GitHub for Mac install. Their GUI Git tool has an option to install command line tools as well. You can download that tool from the GitHub for Mac website, at http://mac.github.com.

Installing on Windows

There are also a few ways to install Git on Windows. The most official build is available for download on the Git website. Just go to http://git-scm.com/download/win and the download will start automatically. Note that this is a project called Git for Windows (also called msysGit), which is separate from Git itself; for more information on it, go to http://msysgit.github.io/.
Another easy way to get Git installed is by installing GitHub for Windows. The installer includes a command line version of Git as well as the GUI. It also works well with Powershell, and sets up solid credential caching and sane CRLF settings. We’ll learn more about those things a little later, but suffice it to say they’re things you want. You can download this from the GitHub for Windows website, at http://windows.github.com.

Installing from Source

Some people may instead find it useful to install Git from source, because you’ll get the most recent version. The binary installers tend to be a bit behind, though as Git has matured in recent years, this has made less of a difference.
If you do want to install Git from source, you need to have the following libraries that Git depends on: curl, zlib, openssl, expat, and libiconv. For example, if you’re on a system that has yum (such as Fedora) or apt-get (such as a Debian based system), you can use one of these commands to install all of the dependencies:
$ yum install curl-devel expat-devel gettext-devel \
  openssl-devel zlib-devel
$ apt-get install libcurl4-gnutls-dev libexpat1-dev gettext \
  libz-dev libssl-dev
When you have all the necessary dependencies, you can go ahead and grab the latest tagged release tarball from several places. You can get it via the Kernel.org site, at https://www.kernel.org/pub/software/scm/git, or the mirror on the GitHub web site, at https://github.com/git/git/releases. It’s generally a little clearer what the latest version is on the GitHub page, but the kernel.org page also has release signatures if you want to verify your download.
Then, compile and install:
$ tar -zxf git-1.9.1.tar.gz
$ cd git-1.9.1
$ make configure
$ ./configure --prefix=/usr
$ make all doc info
$ sudo make install install-doc install-html install-info
After this is done, you can also get Git via Git itself for updates:
$ git clone git://git.kernel.org/pub/scm/git/git.git
 
Source : http://git-scm.com/book/en/v2/Getting-Started-Installing-Git 

Friday 5 September 2014

Server KMS


source : http://www.dbuggr.com/smallwei/resolve-windows-error-0xc004d307-maximum-rearms/

Monday 2 June 2014

Reset a Windows 7 Password

  1. Insert either your Windows 7 installation DVD, or a Windows 7 System Repair disc, into your optical drive and then restart your computer. If you have either on a flash drive, that'll work too.

    Tip: See How to Boot From a CD, DVD, or BD Disc or How to Boot From a USB Device if you've never booted from portable media before or if you're having trouble doing so.

    Note: If you don't have original Windows 7 media and never got around to making a system repair disc, don't worry. As long as you have access to any other Windows 7 computer (another in your home or a friend's will work fine), you can burn a system repair disc for free. See How to Create a Windows 7 System Repair Disc for a tutorial.

  2. After your computer boots from the disc or flash drive, click Next on the screen with your language and keyboard choices.

    Tip: Don't see this screen or do you see your typical Windows 7 logon screen? Chances are good that your computer booted from your hard drive (like it normally does) instead of from the disc or flash drive you inserted, which is what you want. See the appropriate link in the tip from Step 1 above for help.

  3. Click on the Repair your computer link.

    Note: If you booted with a system repair disc instead of a Windows 7 installation disc or flash drive, you won't see this link. Just move on to Step 4 below.

  4. Wait while your Windows 7 installation is located on your computer.

  5. Once your installation is found, take note of the drive letter found in the Location column. Most Windows 7 installations will show D: but yours may be different.

    Note: While in Windows, the drive that Windows 7 is installed on is probably labeled as the C: drive. However, when booting from Windows 7 install or repair media, a hidden drive is available that usually isn't. This drive is given the first available drive letter, probably C:, leaving the next available drive letter, probably D:, for the next drive - the one with Windows 7 installed on it.

  6. Select Windows 7 from the Operating System list and then click the Next button.

  7. From System Recovery Options, choose Command Prompt.

  8. With Command Prompt now open, execute the following two commands, in this order:
    copy d:\windows\system32\utilman.exe d:\
    
    copy d:\windows\system32\cmd.exe d:\windows\system32\utilman.exe
    
    To the Overwrite question after executing the second command, answer with Yes.

    Important: If the drive that Windows 7 is installed on in your computer is not D: (Step 5), be sure to change all instances of d: in the commands above with the correct drive letter.

  9. Remove the disc or flash drive and then restart your computer.
    You can close the Command Prompt window and click Restart but it's also okay in this situation to restart using your computer's restart button.

  10. Once the Windows 7 logon screen appears, locate the little icon on the bottom-left of the screen that looks like a pie with a square around it and then click it!

    Tip: If your normal Windows 7 logon screen did not show up, check to see that you removed the disc or flash drive you inserted in Step 1. Your computer may continue to boot from this device instead of your hard drive if you don't remove it.

  11. Now that Command Prompt is open, execute the net user command as shown, replacing myusername with whatever your user name is and mypassword with whatever new password you'd like to use:
    net user myusername mypassword
    
    So, for example, I would do something like this:
    net user Tim 1lov3blueberrie$
    

    Tip: If your username has spaces, put double quotes around it when executing net user, as in net user "Tim Fisher" 1lov3blueberrie$.

  12. Close the Command Prompt window.

  13. Login with your new password!

  14. Create a Windows 7 Password Reset Disk! This is the Microsoft-approved, proactive step you should have done a long time ago. All you need is a blank flash drive or floppy disk and you'll never need to worry about forgetting your Windows 7 password again.

  15. While not required, it would probably be wise to undo the hack that makes this work. If you don't, you won't have access to accessibiily features from the Windows 7 login screen.
    To reverse the changes you've made, repeat Steps 1 through 7 above. When you have access to Command Prompt again, execute the following:
    copy d:\utilman.exe d:\windows\system32\utilman.exe
    
    Confirm the overwrite and then restart your computer.

    Important: Undoing this hack will have no impact on your new password. Whatever password you set in Step 11 is still valid.

     Source : http://pcsupport.about.com/od/windows7/ht/reset-password-windows-7.htm

Monday 19 May 2014

Search Manual Code Remote multi brand's

Kalau ingin kode remote multi,cukup cari manual dulu.
Kalau sudah bisa tingggal cari kode dengan cara. :
tekan set lama atau "set+power" sampai lampu menyala, kemudian masukan kode 037.
Tekan kembali SET lama atau SET+POWER lalu V+ dan hitung mulai dari 037 (setiap menakan vol di remote anda harus menghitung, contoh:037,038 N seterusnya) sampai muncul tanda volume d TV, hitung sampai di mana hitungan saat muncul volume di tv berarti itulah kode)

source : https://id.answers.yahoo.com/question/index?qid=20120519091400AA2OvhT

Kumpulan Kode Remote Universal Untuk Macam-Macam TV

Assalamualaikum Wr.Wb
Pernahkan sobat menemukan kendala denga romote TV ? Kemudian sobat ingin menggantinya dengan remote baru, karena setelah mencoba untuk memperbaikinya tetap tidak bisa kunjung normal malahan rusak.

Nah apabiala sobat kebetulan mengganti remote tv tersebut, dan membeli remote multi system untuk semua tv dan kebetulan juga sobat tidak ada petunjuk dan kodenya disinilah tempatnya untuk mendapatkan kode-kode tersebut.

Karena kebetulan juga saya pernah membeli remote multi tersebut karena remote tv saya rusak,dan saya mencoba untuk membeli yang satu tipe namun tidak ada, yah terpaksa saya ganti dengan remote multi ini.

Sengaja sob saya menulis artikel ini,karena pernah saya kehilangan cara mengganti kode remote untuk tv yang berbeda. Nah kebetulan sekarang lagi ada saya simpan untuk keperluan saya, jadi ngga repot lagi untuk mencarinya. Dan barang kali juga ada sobat semua yang membutuhkan info ini. Hanya sekedar info remote yang saya pakai ini dari merek joker,MULTI RM99+1D (bukan promosi loh) ini yang saya pakai. Tapi kayaknya untuk merek remote yang lain juga sama asalkan yang multi system.

Namun untuk merek joker,MULTI RM99+1D ada keunggulannya,keunggulan utamanya ialah: JIKA TV SOBAT MEREK digitek/polytron atau tv buatan china (merek tertentu) remote ini dapat dipakai langsung tanpa diprogram,kalu sobat kebetulan mau mengganti remote dengan yang multi silahkan cari dipasar, kayaknya diseluruh nusantara/indonesia pasti ada. Dan cara manual untuk menyesuaikan dengan tv anda dengan cara memasukan kode yang sesuai dengan tv anda, carilah kode merek tv anda di bawah.

Sebagai contoh merek TV AKIRA

1. Tekan "set" (jangan lepas) sampai lampu menyala, kalau cara ini tidak berhasil coba tekan "set" (jangan lepas) lalu tekan "power" setelah lampu nyala, lepaskan kedua tombol.
2. Tekan angka"1", tekan lagi angka "0", terakhir tekan angka"2".
3. Setelah angka terakhir ditekan, lampu akan padam (selesai)

remote.jpg

Nah jadi biasanya multi remote tersebut, hanya menggunakan tiga kode, untuk setiap tipe, jadi kalau sobat mau ngeset kode tersebut dan tv model tertentu cukup dengan tiga kode, dan sesuiakan dengan merek tv sobat, kode dipisahkan dengan koma, silahkan anda coba satu persatu.

  • ADVANCE
    104,120,102,106,103,187,181,224,073
  • ADVANTE
    181,120,102,104,181,224,073
  • AICO
    102,104,181,131,187,073,103,106,025,224
  • AIWA
    009,057,058,102,104,181,224,073,103
  • AKAI
    149,053,056,079,102,104,181,224,073,103
  • AKARI
    013,213,140,015,102,104,181,224,073,103
  • AKARTON
    102,104,073,053,103
  • AKIRA
    016,115,102,178,045,224,181,073,104,124,103,147,151
  • ALL BRANO
    181,102,104,073,153,103,024,131,181,224,187
  • ASANO
    061,102,104,181,224,073,103
  • ASATRON
    073,056,053,102,104,106,103,187,181,224
  • AUDIOTRON
    181,102,103,131,187,073,104,025,224,103
  • AUHTECH
    102,187,120,104,181,073,224,103
  • AVANTE
    181,102,103,131,187,104,224,073,103
  • BASOKE
    017,151,253,150,053,120,024,147,000
  • B/E (MESIN TV)
    102,104,106,103,187,181,073,224
  • BIG BEAUTY
    017,151,253,152,147,024,000
  • BLUEBELLA
    060,290,053,253,024,043,102,104,181,224,073
  • BLUEESKY
    053,102,187,027,043,104,120,024,181,073,103
  • BOMBA
    103,088,073,102,104,060,187,181,224,073,103
  • CASINO
    151,017,152,150,053,120,024,147,253,000
  • CHANGHONG
    002,014,191,182,128,089,008,009,092,102,104,181,224,073,093,010,011,016,026,028,053,051,052,057,058,067,071,086,087,100,159,162
  • CHANCHONG LCD
    002,014,091,182,128,089
  • CHUNLAN
    142,188,208,102,104,187,181,224,073,103
  • CICHI
    118,034,086,027,224,054,120,053,104,102,103,181,073,187
  • CLARION
    024,043,102,104,181,224,073
  • CRYSTAL
    207,102,104,131,181,224,187,073,103,106
  • DAEWOO
    042,012,031,102,104,181,224,187,073,103,106
  • DETRON
    053,212,102,104,131,181,187,073,103,106,224
  • DAICHI
    024,043,102,104,131,181,187,073,224,103
  • DAZZ
    120,102,104,181,224,073,103.
  • DAIKEN
    102,104,131,181,187,073,103,181,224,073
  • DAT
    073,102,104,053,103,024,131.181,224,187
  • DIGIMEDIA
    102,104,131,181,187,073,103,224,106,025
  • DIGITEC
    000,147,151,017,253,152,024,150,053,120,043.
  • DISCSTAR
    151,092,102,104,181,224,073,103.
  • DIVA
    000,147
  • DVS
    102,104,073,053,103,024,131,181,224,187
  • ETRON
    102,104,053,073,224,181,103.
  • FORTUNE
    120,102,104,106,103,187,224,073,181
  • FUJICOM
    102,224,181,104,073,103
  • FUJITEC
    097,077,258,024,043,102,104,131,181,187,073,103,224,103.
  • FUJI ELECTRIC
    223,008,043,102,077,189,024,104,253,120,017,224,181,073,032,103
  • FUJIWA
    102,187,224,104,073,181,103.
  • FULI
    047
  • FURICHI
    224,104,102,181,073,103
  • FUTACHI
    104,181,102,073,106,131,181,224,103
  • GALAXI
    102,104,181,131,106,073,187,103,224,103.
  • GENERAL
    040,102,104,131,181,187,073,103,224,103
  • GOLDSTAR
    140,024,009,019,040,043,098
  • GRAND MASTER
    017,151,253,053,000,024,152,024,152,024,150,120,147
  • GRUNDING
    190,201,280,080
  • HAIER
    178,296,103,105,112,118,119,175,185,186,187,188,201,205,206,218,060
  • HARCO
    061,102,104,073,053,103,024,131,181,224,187
  • HIMIDA
    131,079,075,250,102,187,181,104,199,101,073
  • HITACHI
    187,007,240,251,033,280,080,015,014,027,006,008,010,048,179
  • HITACHI FUJIAN
    007,187,102,104,181,224,073,011,015,014,024,028,053,043,040,043,053,056,006,008,010,048,179,060,061,065,079
  • HUI CIA
    102,187,104,224,103
  • HISENSE
    006,007,008,010,014,015,025,135,045,046,103,105,107,115,116,128,129,130,131,138,139,171,172,173,174,185,186,187,188,189,190,191
  • HIMEIJI
    073,102,104,103,224,181
  • HONGSU
    131,188,039,102,104,181,224,073,103
  • HUANYU
    011,015,024,040,043,053,056,009,057,058,079
  • IGHI
    (118->pip),034,086,027,095,054,120,053,104
  • ICHIBAN
    073,017,151,253,000,152,024,147
  • ICHIKO
    104,102,187,181,131,073,224,103
  • IKAWAGUCHI
    102,104,131,181,187,073,103,106,025,224.
  • INDOTEC
    120,102,104,181,224,073,250,103
  • INTEL
    259,013,213,102,104,181,224,073,250,103
  • ITAMI
    051,102,104,.073,053,024,103
  • ITECH
    181,102,104,224,073,103
  • JENSONIC
    120,102,104,181,073,224,103
  • JHONSON
    024,043,102,104,224,073,103
  • JINSING ITAMI
    120,102,104,181,073,224,103
  • JONSA
    131,102,104,181,187,073,224,103,106,025
  • JVC
    161,004,089,024,156,103
  • KANSLIR
    120,102,104,181,224,073,103
  • KASUMI
    104,102,106,103,187,181,073,224
  • KAWACHI
    104,102,181,187,073,224,073,103
  • KCL
    053,102,104,181,224,073,053,103
  • KIMURA
    095,102,104,073,053,103
  • KONKA
    068,075,081,113,157,102,104,181,224,011,017,073,029,032,034,054,067,069,071,076,077,078,079,080,107,117,163,164,165, 177,210
  • KOREA
    102,187,104,181,073,224,103
  • KOSIMA 025,024,043,102,104,181,224,073,103
  • LASER
    024,043,102,104,1814,224,073,103
  • LENSA
    053,102,104,181,224,073,103
  • LG
    140,024,040,043,259,260,261,043,103
  • LG LCD
    024,140
  • LUCKY STAR
    039,073,224,102,104,181,106,103,025,131,187
  • MAGIC STREO
    147,151,017,253,152,024,000
  • MAROTECH
    120,102,104,181,224,073,103
  • MITOCHIBA
    102,104,181,224,131,187,073,103,106
  • MITSUKOSHI
    102,104,181,224
  • MATSUI
    120
  • MAYAKA
    120
  • MAZDA (MESIN TV)
    102,104,106,103,187,224,073
  • MESIN TV
    102,104,106,103,187,224,181,073
  • MINIMAX
    147,151,017,253,152,000,024
  • MITSHUBISHI
    011,051
  • MITZUNO
    120,102,104,106,103187
  • MODERN
    223,008,024,043,102,104,181,224,073103
  • MULTIMAX
    102,104,073,053,024
  • NAKAI
    104,102,181,131,187,073,103,106,025,224
  • NANOTEX
    073,102,104,053,024,103
  • NATIONAL
    020,001,014,015,021,022,103
  • NEC
    089,140,006,011,016,004,025,053,056,024
  • NIDAI
    102,187,104,181,224,073,103
  • NIKAI
    120,073,187,131,181,102,104,103,106,224
  • NIKO
    102,187,104,224,073,181,103 20
  • NIKON
    009,057,058
  • NITECH
    102,104,073,053,024,103
  • NYCAM
    147,151,152,150,253,017,000
  • NORDMENDE
    214,227,230
  • NINJA
    147,017,151,253,152,150,024,000
  • OLYMPIC
    104,053,102,187,024,043,151,120,103
  • ONMURA
    102,104,073,053,024,095,103
  • OTRE
    104,102,073,053,024,095,103
  • PANASONIC
    020,001,014,015,021,022,059
  • Panasonic LCD
    066,059,020,001,014,015,021,022
  • PANDA
    001,011016021,022,024,025,026
  • PENSONIC
    102,104,073,053,024,103
  • PHILIPS
    024,039,040,043,141,(174-PIP)241,242
  • Philips LCD
    174,024,241,242,039,040,043,141
  • PLASMA
    181,104,102,131,187,073,103,106,224,025
  • PLY-GM 1490
    151,152,150,253,017,000
  • POLYTEC
    120,102,104,224,181,073,103
  • POLYTRON
    147,151,017,253,152,024,150,053,120,043
  • POLIVISION
    017,151,150,147,024,000,152
  • PRIMA
    027,053,073,102,181,104,224,103
  • PROTEC
    120,102,104,224,181,073,103
  • QUARTO
    073,102,104,053,024,103
  • ROADSTAR
    120,102,104,224,181,073,103
  • RCA
    240,251, (lihat kode tv thomson)
  • ROWA
    011,016,024,040,043,096,127,058,182
  • RUYI
    011,015,024,040,043
  • SAAB
    102,104,106,187,181,131,187,073,103,106,025,224
  • SAIJO
    102,104,106,187,181,131,073,103,224
  • SAIGE
    011,025,016,102,104,224,181,073,103
  • SAMSUNG
    050,024,008,011,016,021,025037,039
  • SAMSUNG LCD
    024,050
  • SANEX
    086,102,181,104,224,073,103
  • SANKEI
    092,102,104,224,181,073,103
  • SANKEN
    040,024,215,181,102,104,224,073,103
  • SANSUI
    120
  • SANYO
    099,,223,008,036,007,014,015,035,053,056,079,105,132,133,134,202
  • SANYO LCD
    223,099008,036,007,014,015,035
  • SEMRO
    104,102,181,131,073,187,106,103,224
  • SHANGHAI
    009,011,016,017,022,024,025,040,043,053
  • SHARP
    003,018,016,025,135,136,137
  • SHARP LCD
    136,137,003,018,135
  • SHERWOOD
    016,02503(mesin TV)
  • SIERA
    024,043
  • SINMENG
    104,102
  • SINKO
    102,187,181,104,224,073,103
  • SKYWORTH(RGB)
    011,025,053,045,046,060,070,071,072,073
  • SONY
    135,023,041,049,005,094,106,148,237,238
  • SONY LCD
    023,135
  • SONYA
    102,224,181,224,104,073,103
  • START
    181,086,102,104,224,073,103
  • STEELE
    102,104,181,224,073,103
  • SUGA
    151,152,024,147,253,017,000
  • SUKIRA
    102,056,073,053,101,187,224,181,104
  • SOLITRON
    050,120,024,043,102,104,224,181,073
  • SUMO
    147,017,151,253,152,150,147,024,000
  • SUPERSTAR
    104,102,224,181,224,181,073,103
  • SUPERTECH
    120,102,104,181,224,073,103
  • SUPERTURBO
    077,102,106,104,187,181,073,224,103
  • SUPRA
    024,043,120,104,224,181,073,102,103
  • TAMSONICH
    024,104,102,181,131,187,073,025,103
  • TANAKA (MESIN TV)
    102,104,106,103,187,181,224,073
  • TAMASI
    102,104,073,053,024,103
  • TENNOK
    102,104,103,224,181,073
  • TELESONIC
    120,102
  • TELETEX
    120
  • THOMSON
    033,080,280,221,252,255,257,264,
    270
  • TICSONIC
    102,104,187,181,224,073,103
  • TOSHIBA
    128,089,090,014,016,027,053
  • Toshiba LCD
    089,128
  • TURBO
    077,000,147,151,214,150,017,253
  • TOBO
    016,025,053,056,079,101,103
  • TV MEDIA
    102,104,073,053,024,103
  • UNISAT
    102,104,073,053,103,024,131,181,224
  • u-SLIM
    000
  • VEGATRONVICTOR
    053
  • VIDEO
    053
  • VISONIC
    131,188,102,104,073,053,103
  • VITRON
    073,181,224,102,187,103,104
  • VOTRE
    073,102,104,053,024,103
  • WCOM TORAS
    102,104,073,103
  • WINASAT
    102,224,104,181,224,104,073,103
  • WINSAR
    102,187,181,224,104,073,103
  • WINSTAR
    102,104,073,053,024,103
  • W-SONIC
    104,102,224,103,073
  • XEGOGO
    027,102,104,103,224,181,073
  • XCEL
    147,00018
  • YONGMA
    102,104,181,224,073,103
  • YUNDAI
    102,104,181,224,073,103
  • ZIPPEIN
    000,151


Itulah kode-kode untuk multi remote yang mungkin sobat butuhkan, dan siapa saja yang merasa merek Tv nya anda belum ada pada daftar diatas dan kebetulan belum ada kodenya silahkan saja sobat request, saya siap membantu sobat semua.

Sekian Semoga Bermanfaat...
Wassalamualaikum Wr.Wb

Source : http://rifky182.heck.in/kumpulan-kode-remote-universal-untuk-mac.xhtml

Monday 12 May 2014

Resetting MySQL Root Password: Red Hat and CentOS

If u have forgot mysql password in centos or redhat , how to change password steps given below..

Stop MySQL:
root#  service mysqld stop

Start MySQL in safe mode:
root#  mysqld_safe  --skip-grant-tables &

Log into MySQL as root:
root#  mysql -u root

Reset the password:
mysql>  update mysql.user set password=PASSWORD("your new password") where User='root';

mysql>  flush privileges; exit;

Log out of MySQL and stop the Safe Mode:
root#  service mysqld stop

Start MySQL in the normal mode:
root#  service mysqld start

Log into MySQL with your new password:
root#  mysql -u root -p
Enter password:
mysql>

Install Bacula Centos 6.5

install bacula

yum install mysql-devel mysql-

server mysql ncurse* gcc gcc-c++

autoconf automake

wget

http://sourceforge.net/projects/bac

ula/files/bacula/7.0.2/bacula-

7.0.2.tar.gz

tar -xzvf bacula-7.0.2.tar.gz

cd bacula-7.0.2

CFLAGS="-g -Wall" ./configure --enable-smartalloc --with-mysql --enable-conio

make

make install

make install-autostart

cd /etc/bacula

./grant_mysql_privileges -p

./create_mysql_database -p

./make_mysql_tables -p

yum -y install bacula-console-bat

Source :

Sunday 11 May 2014

Add a Volume to Your Instance

Now that you've launched and connected to your Linux instance, you can run the following command on your instance to view its mounted volumes.
[ec2-user ~]$ df -h
For a micro instance, your output should look something like this.
Filesystem             Size   Used  Avail Use% Mounted on
/dev/xvda1             8.0G   1.1G   6.9G  14% /
tmpfs                  298M      0   298M   0% /dev/shm
The /dev/xvda1 volume is the root device volume. It contains the image used to boot the instance. Notice that there's some room to install additional software on your instance. For example, you can use the yum command to download and install packages.
If you need additional storage for your data, a simple solution is to add Amazon EBS volumes to your instance. An Amazon EBS volume serves as network-attached storage for your instance. Let's add a volume to the Linux instance that you've launched. First we'll use the EC2 console to create the volume and attach it to the instance, and then we'll mount the volume to make it available.
To create and attach an Amazon EBS volume
  1. Open the Amazon EC2 console at https://console.aws.amazon.com/ec2/.
  2. In the navigation bar, select the region in which you created your instance, and then click Instances in the navigation pane.
    The console displays the list of current instances in that region. Select your Linux instance. In the Description tab in the bottom pane note the Availability Zone for the instance.
  3. In the navigation pane, under Elastic Block Store, click Snapshots. Select Public Snapshots from the filter list. Select a snapshot from the list and note its snapshot ID. The Free Usage Tier provides up to 30 GB of Amazon Elastic Block Storage; therefore, to avoid being charged for this tutorial, choose a snapshot that is smaller than 30 GB.
    Note that this tutorial assumes that you create the volume using a snapshot as described in this step. If you create an empty volume instead, we'll ask you to perform an additional step in the next procedure.
  4. Click Create Volume.
  5. The Create Volume dialog box is preconfigured with the snapshot ID and volume size of the snapshot you selected. Configure the following, and then click Create:
    • Select the Standard volume type to create a standard EBS volume.
    • Select the same Availability Zone that you used when you created your instance. Otherwise, you can't attach the volume to your instance.
  6. In the navigation pane, under Elastic Block Store, click Volumes. Notice that your newly created volume appears there and the state of the volume is available, so it's ready to be attached to an instance.
  7. Right-click the newly created volume and select Attach Volume.
  8. In the Attach Volume dialog box, configure the following, and then click Attach:
    • Start typing in the name or ID of your instance, then select it from the list of suggested options.
    • Specify an unused device name for that instance. We'll use /dev/sdf in this tutorial. If you select a different device name, be sure to note it as you'll need this information in the next procedure.
You'll notice that in the Details pane for your volume, the state of the volume is in-use, and the volume is attached to your instance with the device name /dev/sdf. However, if you return to your instance and run the df -h command again, you won't see the volume yet. That's because we need to mount the volume for df -h to see it. The lsblk command, however, can see all block devices attached to the instance.
Note
Some Linux distributions do not provide the lsblk command by default. If the lsblk command does not work, you can use sudo fdisk -l | grep Disk instead.
[ec2-user ~]$ lsblk
NAME    MAJ:MIN RM  SIZE RO TYPE MOUNTPOINT
xvdf    202:80   0  100G  0 disk
└─xvdf1 202:81   0   10G  0 part
xvda1   202:1    0    8G  0 disk /
In the above example, lsblk reports that there are two block devices attached to the instance; xvda1 is mounted as the root file system (note the MOUNTPOINT value of /) and xvdf (which contains the disk partition, xvdf1) is not mounted at all.
To make a volume available
  1. Identify the device to mount. In the previous procedure, the new volume was attached to /dev/sdf. Depending on the block device drivers on your instance's operating system, the device may appear at a different location (such as /dev/xvdf in the previous example) than what you specified in the console (/dev/sdf); in some cases, even the trailing letter may change (for example, /dev/xvdj). Amazon Linux instances always create links from the device path that you specified in the console to the new device path, but other distributions (such as Ubuntu or Red Hat) are not as predictable.
    Use the lsblk command to list the available devices.
    Note
    Some Linux distributions do not provide the lsblk command by default. If the lsblk command does not work, you can use sudo fdisk -l | grep Disk instead.
    [ec2-user ~]$ lsblk
    NAME    MAJ:MIN RM  SIZE RO TYPE MOUNTPOINT
    xvdf    202:80   0  100G  0 disk
    └─xvdf1 202:81   0   10G  0 part
    xvda1   202:1    0    8G  0 disk /
    The xvdf device is not mounted, and there is a 10 GB partition at xvdf1. Sometimes when you create a volume from a snapshot, the data on the volume is contained in a partition such as this instead of the root of the volume. In this case, you mount the /dev/xvdf1 partition (the lsblk command output omits the /dev/ portion of the file path). If there was not a partition on xvdf, then you would mount /dev/xvdf.
  2. (Optional) If you created an empty volume instead of creating a volume from a snapshot in the previous procedure, you need to format the volume using mkfs before you can mount it. Use the following command to create an ext4 file system on the volume. Substitute the device name (such as /dev/xvdf) for device_name.
    Caution
    This step assumes that you're mounting an empty volume. If you're mounting a volume that already has data on it (for example, a volume that was restored from a snapshot), don't use mkfs before mounting the volume (skip to the next step instead). Otherwise, you'll format the volume and delete the existing data. For more information, see Making the Volume Available on Linux.
    Note
    SUSE Linux Enterprise Server 11 does not fully support ext4 file systems. If you chose a SLES 11 AMI for your instance, use ext3 in the following command instead.
    [ec2-user ~]$ sudo mkfs -t ext4 device_name
  3. To mount the device as /mnt/my-data, run the following commands.
    [ec2-user ~]$ sudo mkdir /mnt/my-data
    [ec2-user ~]$ sudo mount /dev/xvdf1 /mnt/my-data
    Be sure to specify the device name you identified in Step 1; otherwise, you might receive the following error when you run this mount command: "mount: you must specify the filesystem type". If you see this error, repeat Step 1 and use the correct device path (remember to add the /dev/ to the device name you get from the lsblk command).
  4. Now when you run the df -h command, you'll see output like the following.
    [ec2-user ~]$ df -h
    Filesystem            Size  Used Avail Use% Mounted on
    /dev/xvda1            7.9G  1.1G  6.8G  14% /
    tmpfs                 298M     0  298M   0% /dev/shm
    /dev/xvdf1             10G   76M   10G   1% /mnt/my-data
  5. To view the contents of the new volume, run the following command.
    [ec2-user ~]$ ls /mnt/my-data
At this point, you have completed the example architecture for this tutorial. You can continue to customize and use your instance for as long as you wish.
Important
Remember, if you launched an instance in the Free Usage Tier, there are no charges. Otherwise, as soon as your instance starts to boot, you're billed for each hour or partial hour that you keep the instance running, even if the instance is idle. You'll stop incurring charges for a regular instance as soon as the instance status changes to shutting down or terminated.
When you're finished with your instance, don't forget to clean up any resources you've used and terminate the instance, as shown in the next step, Clean Up Your Instance and Volume.

Source : http://docs.aws.amazon.com/AWSEC2/latest/UserGuide/ec2-add-volume-to-instance.html

Setup Backup Server Using Bacula And Webmin On CentOS 6.5/6.4

Bacula is an open source, network backup software, used to allow the System Administrators to manage backup, recovery and send the verification of data’s from any systems in any location across the network.

Install Bacula
In this how-to i am using MySQL for database, you can use either PostgreSQL or MySQL. My Backup server hostname and IP Address are “server.unixmen.local” and “192.168.1.101/24″ respectively. Change the values as per your scenario. This how-to was tested on CentOS 6.5, although it should work with RHEL, Scientific Linux 6.x versions too.
First let us install Bacual and mysql server using command:
# yum install bacula-director-mysql bacula-console bacula-client bacula-storage-mysql mysql-server mysql-devel -y
Start MySQL service and create root password for mysql.
Note: In this tutorial, i am using password as “centos” wherever i need to setup password . Define your own.
# service mysqld start
# chkconfig mysqld on
# mysqladmin -u root password centos
Next run the following commands one by one to create database and necessary tables for Bacula. Here “-u root” means that login with root account and “-p” means prompt for mysql root password i.e “centos” in my case.
# /usr/libexec/bacula/grant_mysql_privileges -u root -p
# /usr/libexec/bacula/create_mysql_database -u root -p
# /usr/libexec/bacula/make_mysql_tables -u root -p
# /usr/libexec/bacula/grant_bacula_privileges -u root -p
Now set bacula user password on MySQL. To do that, log in to your MySQL server with command:
# mysql -u root -p
And set password as shown below:
Welcome to the MySQL monitor.  Commands end with ; or \g.
Your MySQL connection id is 67
Server version: 5.5.35 MySQL Community Server (GPL) by Remi

Copyright (c) 2000, 2013, Oracle and/or its affiliates. All rights reserved.

Oracle is a registered trademark of Oracle Corporation and/or its
affiliates. Other names may be trademarks of their respective
owners.

Type 'help;' or '\h' for help. Type '\c' to clear the current input statement.

mysql> UPDATE mysql.user SET password=PASSWORD("centos") WHERE user='bacula';
Query OK, 2 rows affected (0.00 sec)
Rows matched: 2  Changed: 2  Warnings: 0

mysql> FLUSH PRIVILEGES;
Query OK, 0 rows affected (0.01 sec)

mysql> exit
Bye
Now update all Bacula configuration files with new password and addresses as shown below.
Update Bacula Director
Edit file /etc/bacula/bacula-dir.conf,
# vi /etc/bacula/bacula-dir.conf
Update Bacula server hostname, bacula mysql user password, Bacula console password, Bacula file daemon password etc. Be mindful that you should use a fully qualified domain name for adding clients or simply use the IP address instead.
[...]
Director {                            # define myself
  Name = bacula-dir
  DIRport = 9101                # where we listen for UA connections
  QueryFile = "/usr/libexec/bacula/query.sql"
  WorkingDirectory = "/var/spool/bacula"
  PidDirectory = "/var/run"
  Maximum Concurrent Jobs = 1
  Password = "centos"         # Console password
  Messages = Daemon

[...]

# Client (File Services) to backup
Client {
  Name = bacula-fd
  Address = 192.168.1.101
  FDPort = 9102
  Catalog = MyCatalog
  Password = "centos"          # password for FileDaemon
  File Retention = 30 days            # 30 days
  Job Retention = 6 months            # six months
  AutoPrune = yes                     # Prune expired Jobs/Files
}

[...]
# Definition of file storage device
Storage {
  Name = File
# Do not use "localhost" here
  Address = 192.168.1.101                # N.B. Use a fully qualified name here
  SDPort = 9103
  Password = "centos"
  Device = FileStorage
  Media Type = File
}

[...]
# Generic catalog service
Catalog {
  Name = MyCatalog
# Uncomment the following line if you want the dbi driver
# dbdriver = "dbi:sqlite3"; dbaddress = 127.0.0.1; dbport =
  dbname = "bacula"; dbuser = "bacula"; dbpassword = "centos"
}

[...]

Console {
  Name = bacula-mon
  Password = "centos"
  CommandACL = status, .status
}
Update Bacula Console
Edit file /etc/bacula/bconsole.conf,
# vi /etc/bacula/bconsole.conf
Change the console password:
Director {
  Name = bacula-dir
  DIRport = 9101
  address = localhost
  Password = "centos"
}
Update Storage Daemon
Edit file /etc/bacula/bacula-sd.conf,
# vi /etc/bacula/bacula-sd.conf
Update the password, Find the red lines and delete them, do not uncomment them. Also set your Archive device path.
[...]
Director {
  Name = bacula-dir
  Password = "centos"
}

##Delete the following lines (Do not uncomment). As i installed centos minimal server, i don't have a GUI mode, so that i deleted the following section##

# Restricted Director, used by tray-monitor to get the
#   status of the storage daemon
#
Director {
  Name = bacula-mon
  Password = "@@MON_SD_PASSWORD@@"
  Monitor = yes
}

[...]

Device {
  Name = FileStorage
  Media Type = File
  Archive Device = /mybackup
  LabelMedia = yes;                   # lets Bacula label unlabeled media
  Random Access = Yes;
  AutomaticMount = yes;               # when device opened, read it
  RemovableMedia = no;
  AlwaysOpen = no;
}
[...]
Update file daemon
Edit file /etc/bacula/bacula-fd.conf,
# vi /etc/bacula/bacula-fd.conf
Update the password and delete the lines shown in red colour.
# List Directors who are permitted to contact this File daemon
#
Director {
Name = bacula-dir
Password = "centos"
}

##Delete (do not uncomment) these lines if you only using CUI mode in Backup server ##

# Restricted Director, used by tray-monitor to get the
#   status of the storage daemon
#
Director {
Name = bacula-mon
Password = "@@MON_SD_PASSWORD@@"
Monitor = yes
}
As i mentioned in the above configuration, my archive device path is “/mybackup”. So let me create a directory called “mybackup”.
# mkdir /mybackup
# chown bacula /mybackup
Now we finished all passwords and address modifications. Next restart all bacula daemons and make them to start automatically on every reboot.
# service bacula-dir start
# service bacula-fd start
# service bacula-sd start
# chkconfig bacula-dir on
# chkconfig bacula-fd on
# chkconfig bacula-sd on
Bacula has been successfully installed and configured. You can now add clients, jobs and volumes by updating the bacula config files. Alternatively you can use webmin to make the work more simple. It is quite easier then updating the config files manually.
Manage Bacula With Webmin
Webmin is a web-based interface for system administration for Unix. Using any modern web browser, you can setup user accounts, Apache, DNS, file sharing and much more.
Download and install the latest version of webmin from here.
# wget http://sourceforge.net/projects/webadmin/files/webmin/1.660/webmin-1.660-1.noarch.rpm
# rpm -Uvh webmin-1.660-1.noarch.rpm
# service webmin start
# chkconfig webmin on
Adjust Firewall/Router
If you want to access the bacula server through from a remote system, allow the webmin port “10000″ and bacula ports “9101″, “9102″, “9103″ through your firewall or router.
Edit file /etc/sysconfig/iptables,
# vi /etc/sysconfig/iptables
Add these following lines in your iptables config file.
[...]
-A INPUT -m state --state NEW -m tcp -p tcp --dport 10000 -j ACCEPT
-A INPUT -m state --state NEW -m tcp -p tcp --dport 9101 -j ACCEPT
-A INPUT -m state --state NEW -m tcp -p tcp --dport 9102 -j ACCEPT
-A INPUT -m state --state NEW -m tcp -p tcp --dport 9103 -j ACCEPT
[...]
Restart iptables:
# service iptables restart
Access Webmin
Now you can login through webmin by “//http://server-ip-address:10000″ or “http://domain-name:10000/”.
Login to webmin using your root user and its password.
Login to Webmin - Mozilla Firefox_001You will find the Bacula Backup System in the left pane of webmin console under System -> Bacula Backup System. If not is found there, try in the “unused modules” section.
Selection_002
Click on the “Bacula Backup System” link. Initially the Bacula server won’t start automatically. To start Bacula server click on “Module Configuration” link on the right of the “Bacula Backup System” page.
Webmin 1.660 on server.unixmen.local (CentOS Linux 6.5) - Mozilla Firefox_003Select the database i.e “MySQL” in this case and enter the bacula database user password. Then click save.
Webmin 1.660 on server.unixmen.local (CentOS Linux 6.5) - Mozilla Firefox_004
Now you will get the window like shown below.
Webmin 1.660 on server.unixmen.local (CentOS Linux 6.5) - Mozilla Firefox_005That’s it. From here you can add Backup clients, Volumes and schedule jobs etc.
Good Luck!
Reference Links:


Source : http://www.unixmen.com/install-and-configure-bacula-server-in-centos-6-4-rhel-6-4/