Saturday, 5 June 2021

LinuxFX Change TimeZone

My solution was to move /etc/localtime out of the way:

Code: Select all

mv /etc/localtime  /etc/wsf-localtime-wsf
Then link /etc/localtime back to the Jakarta timezone:

Code: Select all

ln -s  /usr/share/zoneinfo/Asia/Jakarta   /etc/localtime
This immediately updated my timezone, and then the timedatectl command produced the output I was expecting.

A coworker mentioned that I might have needed to stop ntp (in my case chronyd on RHEL7) temporarily; however, with this new soft-link in place the system was set to my expectation. The change was persistent beyond a reboot too, which I did expect to happen but wanted to be certain.

Tuesday, 25 May 2021

Menambahkan Compliance Test pada UBNT

 Sudah diketahui bahwa firmware UBNT terbaru dengan seri XW maupun XM sudah tidak lagi mencantumkan Compilance test dalam list kode negara. Sudah banyak tulisan yang membahas ini beserta trick agar CT (Compliance Test) dapat digunakan pada perangkat, namun pada umumnya trik penambahan CT ini dilakukan sebelum link running atau dilakukan sebelum pemilihan kode negara.
Bagaimana jika kita membutuhkannya ketika link sudah running, sedangkan kode negara tidak bisa diganti ketika perangkat ini sudah running. Tentunya kita dapat melakukan penambahan CT ini dengan melakukan reset pada setingan yang sudah ada yang mana kita tentunya harus berada dilokasi :D.


Kali ini akan dibahas bagaimana cara penambahan CT tanpa harus melakukan reset, ikuti saja langkahnya sebagai berikut :


Berikut ini contoh screenshot perangkat yang belum dilakukan penambahan CT :


1. Yang harus kita lakukan adalah login ke perangkat via SSH dengan menggunakan Putty ataupun aplikasi remote console kesayangan anda.


2. Setelah sukses login via SSH,lakukan trik penambahan CT dengan cara yang sama pada tutorial yang sudah tersebar di google.

 touch /etc/persistent/ct

3. File konfigurasi yang digunakan pada perangkat UBNT biasanya adalah file /tmp/system.cfg dan /tmp/running.cfg, karena sudah tahu file yang akan dimodifikasi, maka kita cek dulu kode negara dengan mengetikkan perintah:

  cat /tmp/system.cfg | grep code

  hasilnya :

  radio.1.countrycode=360
  radio.countrycode=360

360 adalah kode negara untuk Indonesia, sedangkan untuk CT kodenya 511, maka disini kita akan   merubah 360 menjadi 511 pada kedua file /tmp/system.cfg dan /tmp/running.cfg.

4. Cara merubah kode negara tersebut bisa dilakukan dengan menggunakan vi editor maupun perintah sed, karena saya pemalas maka saya akan menggunakan sed saja :D, ketik saja pada terminal anda :

  sed -i 's/countrycode=360/countrycode=511/g' /tmp/system.cfg

 dan

  sed -i 's/countrycode=360/countrycode=511/g' /tmp/running.cfg

5. Anda bisa skip langkah ini bila sudah yakin, tetapi saya lebih suka mengecek ulang  :D, ketikan perintah dibawah ini untuk melihat apakah kode negara sudah berubah atau belum :

  cat /tmp/system.cfg | grep code

  hasilnya :

  radio.1.countrycode=511
  radio.countrycode=511

yak sudah berubah :D

6. ketik save
7. ketik reboot
8. Tunggu sampai perangkat nyala kembali :D

Dan hasilnya :D


CT siap dengan banyak pilihan channel.


Sekian Terimakasih..

NB: 

Untuk versi baru, compilance test digantikan dengan Licensed 


Source : http://sehitam-kopi.blogspot.com/2017/03/menambahkan-compilance-test-pada-ubnt.html

Thursday, 20 May 2021

Me-Reset Routerbord Mikrotik


Berikut ini langkah-langkah mereset Routerboard Mikrotik pada RB951ui-2nd dan sejenisnya,

  1. Matikan power Routerboard Mikrotik
  2. Tekan tombol reset dengan jarum atau sejenisnya
  3. Nyalakan power (dalam keadaan tombol reset masih ditekan)
  4. Tahan tombol reset sekitar 5-10 detik sampai lampu indikator “USR” selesai berkedip (posisi led hidup)
  5. Lepas tombol reset
  6. Mikrotik akan mereset dan siap digunakan


source : https://klinikit.id/cara-melakukan-reset-mikrotik-rb951ui-2nd/

Thursday, 29 April 2021

How to Enable Long Path Support in Windows 10 (1607) and Higher

Since Windows 10 Anniversary Update (1607), it became possible to disable the MAX_PATH limit on the Windows operation system level without using prefix \\?. By default, this feature is disabled.

To enable the built-in support for long paths in Windows 10/Windows Server 2016, use the Regedit.exe editor to set the LongPathsEnabled parameter of REG_DWORD in the registry key HKLM\SYSTEM\CurrentControlSet\ControlFileSystem with a value 1.

the file name(s) would be too long for the destination folder

You can change this registry parameter with the following PowerShell command:

Set-ItemProperty -Path HKLM:\SYSTEM\CurrentControlSet\ControlFileSystem -Name LongPathsEnabled -Value 1

Or you can enable long path support via Group Policy Editor (Win + R gpedit.msc) Computer Configuration > Administrative Templates > System > Filesystem. Enable the policy Enable NTFS long paths.


Source : https://theitbros.com/destination-path-too-long-error-when-movingcopying-a-file/

Saturday, 16 January 2021

Offline install of .NET Framework 3.5 in Windows 10 using DISM

Windows 10 comes with .NET framework 4.5 pre-installed, but many apps developed in Vista and Windows 7 era require the .NET framework v3.5 installed along with 4.5. These apps will not run unless you will install the required version. When you try to run any such app, Windows 10 will prompt you to download and install .NET framework 3.5 from the Internet. However, this will take a lot of time. You can save your time and install .NET Framework 3.5 from the Windows 10 installation media. This method is much faster and does not even require an Internet connection. Here is how to install it.

To install .NET Framework 3.5 in Windows 10, do the following:
  1. Insert your Windows 10 DVD, or double click its ISO image, or insert your bootable flash drive with Windows 10, depending on what you have.
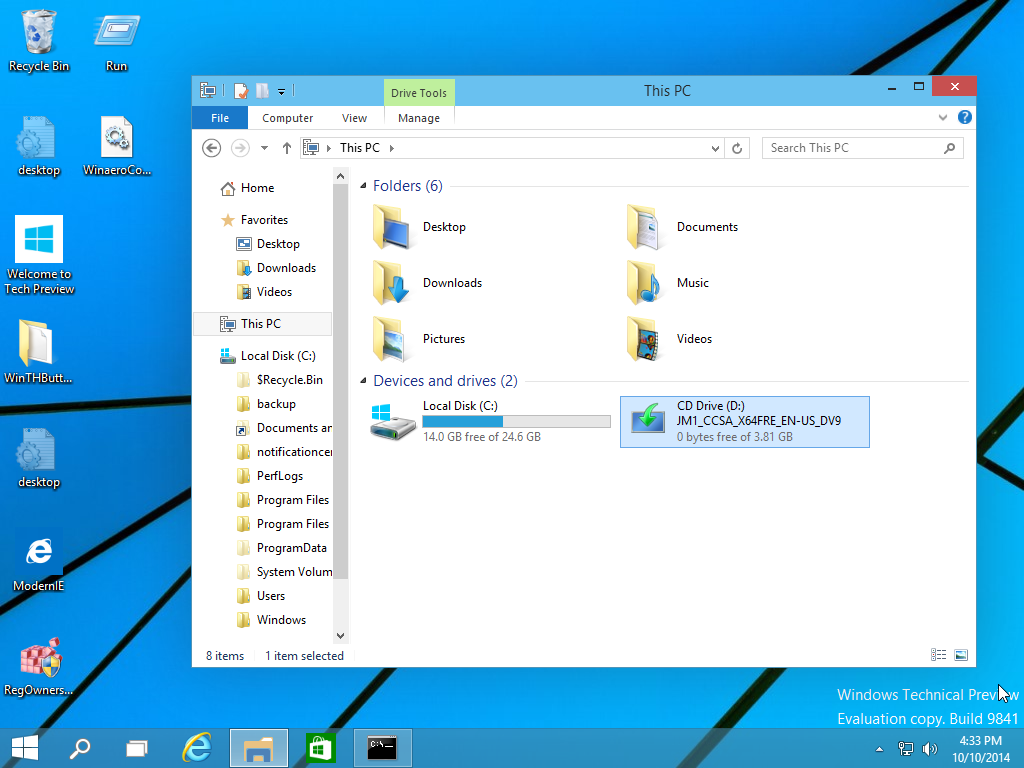
  2. Open 'This PC' in File Explorer and note the drive letter of the installation media you have inserted. In my case it is disk D:
    installation media drive d
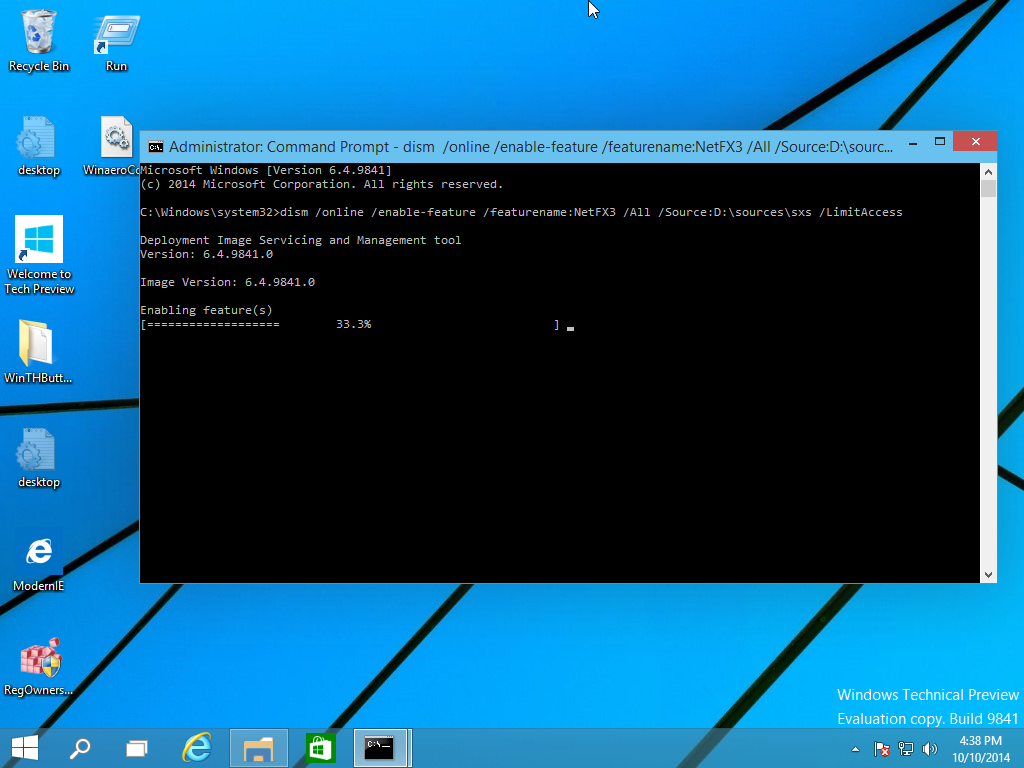
  3. Now open an elevated command prompt and type the following command:
    Dism /online /enable-feature /featurename:NetFX3 /All /Source:D:\sources\sxs /LimitAccess

    Replace D: with your drive letter for Windows 10 installation media.
    dism

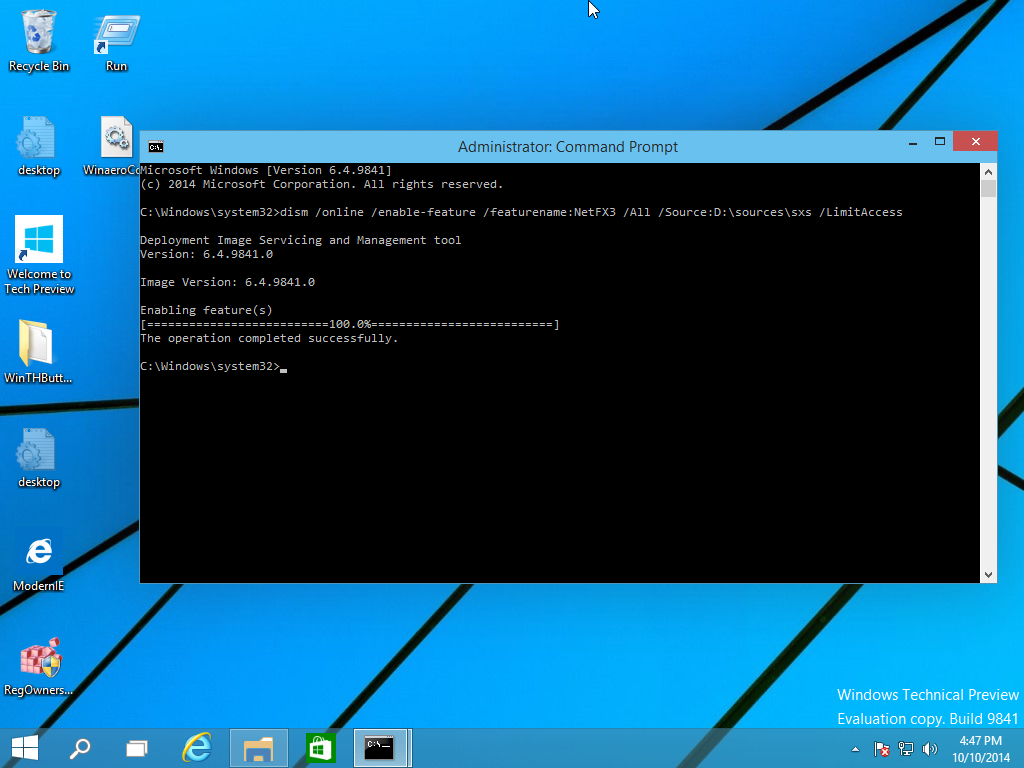
You are done! This will install .NET framework 3.5 in Windows 10.
net installed seccessfully
To save your time, I have prepared a simple batch file which will save your time and will find the inserted installation media automatically. It looks like this:

@echo off
Title .NET Framework 3.5 Offline Installer
for %%I in (D E F G H I J K L M N O P Q R S T U V W X Y Z) do if exist "%%I:\\sources\install.wim" set setupdrv=%%I
if defined setupdrv (
echo Found drive %setupdrv%
echo Installing .NET Framework 3.5...
Dism /online /enable-feature /featurename:NetFX3 /All /Source:%setupdrv%:\sources\sxs /LimitAccess
echo.
echo .NET Framework 3.5 should be installed
echo.
) else (
echo No installation media found!
echo Insert DVD or USB flash drive and run this file once again. 
echo.
)
pause

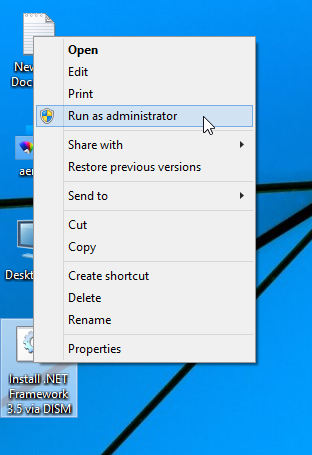
Download the file, extract it from the ZIP archive to the Desktop, right click it and choose Run as administrator. The file will install .NET Framework 3.5 automatically after finding the drive letter of your Windows 10 installation media.
run as administrator

Source : https://winaero.com/offline-install-of-net-framework-3-5-in-windows-10-using-dism/

PDFZilla

 PDFZilla Serial Key (2021)

  • A6OT9DRLO7W7928

PDFZilla Registration Code (2021)

  • A1Q2SW3D-4GFR5TG6-Y7HIK9IO-LQA2SW3R-5TG6Y7HI
  • K9AQ2WS3-RF5TG6Y7-HJ8IK9AQ-2SW3RF5T-G6FY7HJ8
  • AK90HL2Q-AWS3RF5T-G6Y7HIK9-0JLQ2WS3-RF5TG6Y7

Source : https://freeprosoftz.com/pdfzilla-crack/

Friday, 15 January 2021

Cara Menghilangkan Login Screen di Coreldraw X7 dan X8

CorelDraw adalah editor grafik vektor yang dikembangkan oleh Corel, sebuah perusahaan perangkat lunak yang bermarkas di Ottawa, Kanada. ( Wikipedia ) 


Cara Menghilangkan Jendela Login di Coreldraw :

Perhatian : Sebelumnya tutup dulu Aplikasi Coreldraw kamu

1.Cari Folder tempat kamu menginstall Coreldraw
   C:\Program Files\Corel

2.Ketik RMP pada kolom Search


 3.Hapus file yang berawalan RMP


4.Buka Recycle Bin

 5. , Pastikan bahwa 6 File yang berawalan RMP benar benar terhapus


6.Selesai


Source : https://bedahtips.blogspot.com/2016/06/cara-menghilangkan-login-screen-di.html