ERROR: Your Cacti database login account does not have access to the MySQL TimeZone database. Please provide the Cacti database account "select" access to the "time_zone_name" table in the "mysql" database, and populate MySQL's TimeZone information before proceeding
====== Solusi ======
# mysql -u root -p mysql
Enter password: Reading table information for completion of table and column names You can turn off this feature to get a quicker startup with -A Welcome to the MySQL monitor. Commands end with ; or \g. Your MySQL connection id is 670 Server version: 5.1.73 Source distribution Copyright (c) 2000, 2013, Oracle and/or its affiliates. All rights reserved. Oracle is a registered trademark of Oracle Corporation and/or its affiliates. Other names may be trademarks of their respective owners. Type 'help;' or '\h' for help. Type '\c' to clear the current input statement.
mysql> GRANT SELECT ON mysql.time_zone_name TO cacti@localhost; Query OK, 0 rows affected (0.00 sec) mysql> flush privileges; Query OK, 0 rows affected (0.00 sec) mysql> exit Bye
If this is NOT your first time setting up the password, try this method: mysql>UPDATE mysql.userSET Password=PASSWORD('your_new_password')WHEREUser='root';
Cacti tool is an open-source web-based network monitoring and system monitoring graphing solution for IT business. Cacti enable a user to poll services at regular intervals to create graphs on resulting data using RRDtool. Generally, it is used to graph time-series data of metrics such as network bandwidth utilization, CPU load, running processes, disk space, etc.
In this how-to, we are going to show you how to install and set up a complete network monitoring application called Cacti using Net-SNMP tool on RHEL, CentOS and Fedora systems using YUM and DNF package manager tool.
Cacti Required Packages
The Cacti required the following packages to be installed on your Linux operating systems like RHEL / CentOS / Fedora.
Apache : A Web server to display network graphs created by PHP and RRDTool.
MySQL : A Database server to store cacti information.
PHP : A script module to create graphs using RRDTool.
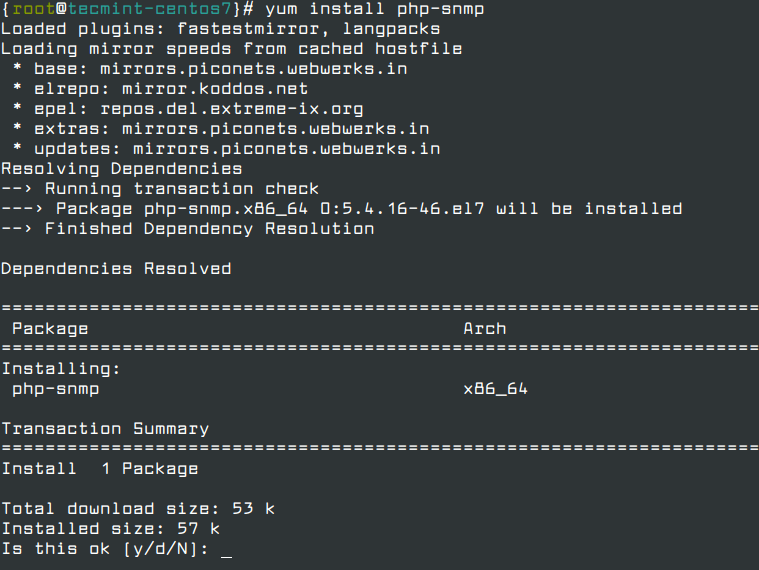
PHP-SNMP : A PHP extension for SNMP to access data.
NET-SNMP : A SNMP (Simple Network Management Protocol) is used to manage the network.
RRDTool : A database tool to manage and retrieve time series data like CPU load, Network Bandwidth, etc.
Note: The installation instructions were shown here are written based on CentOS 7.5 Linux distribution.
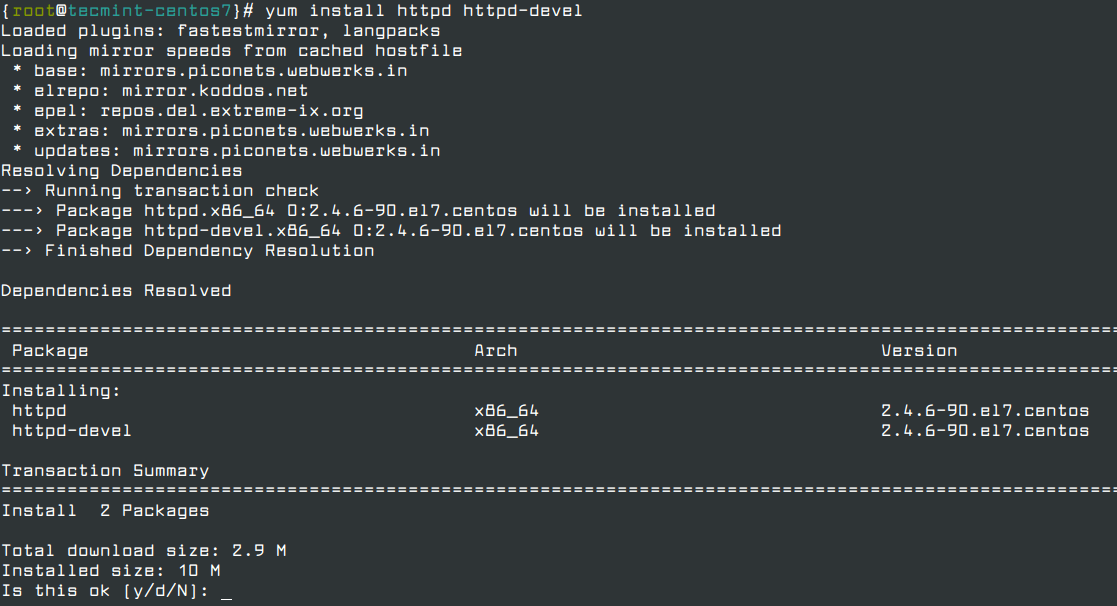
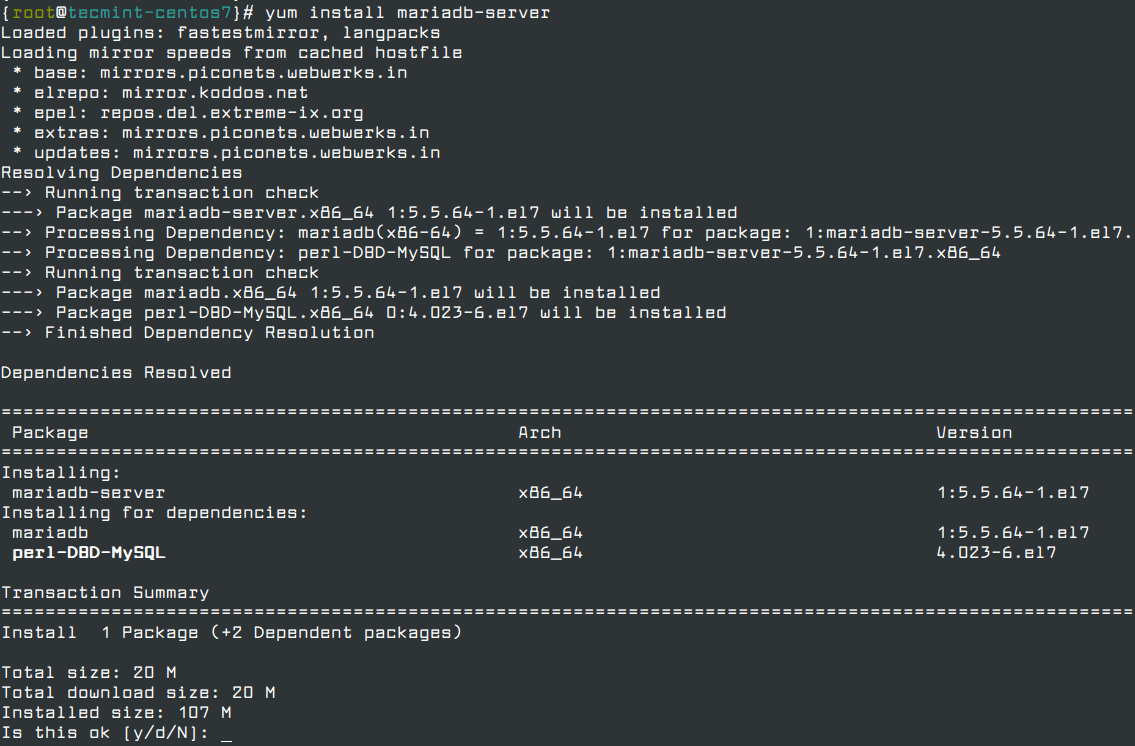
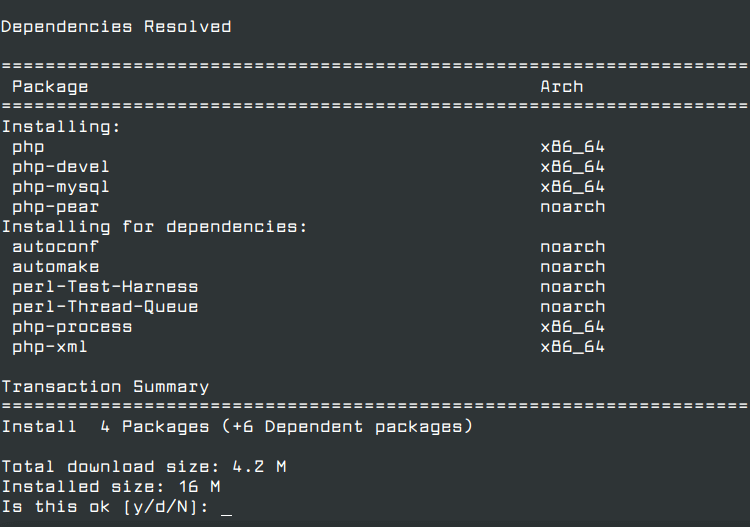
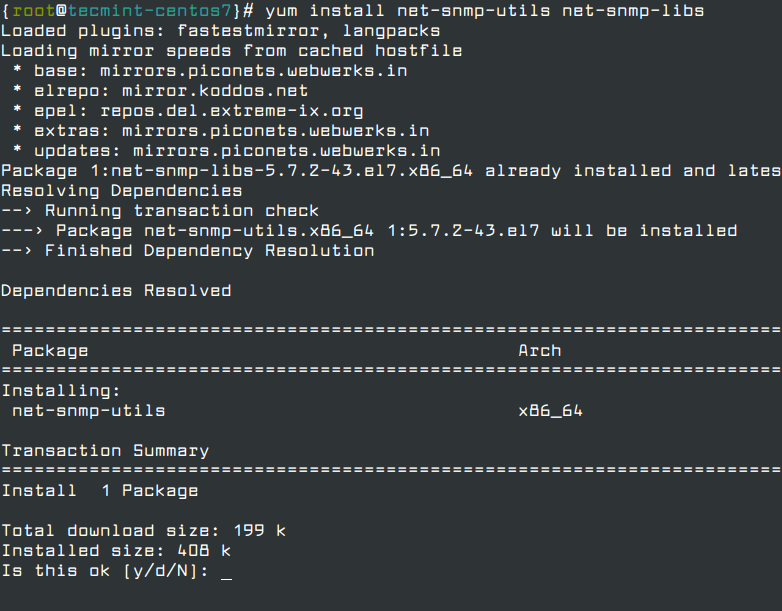
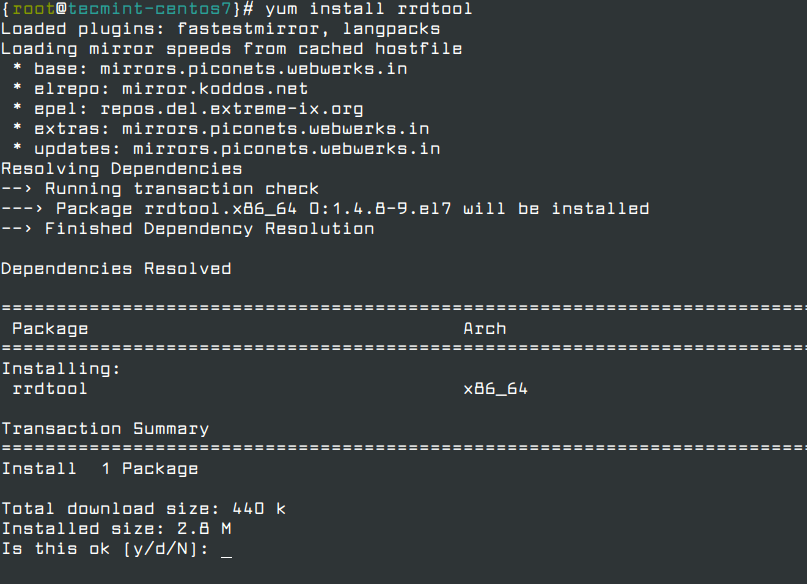
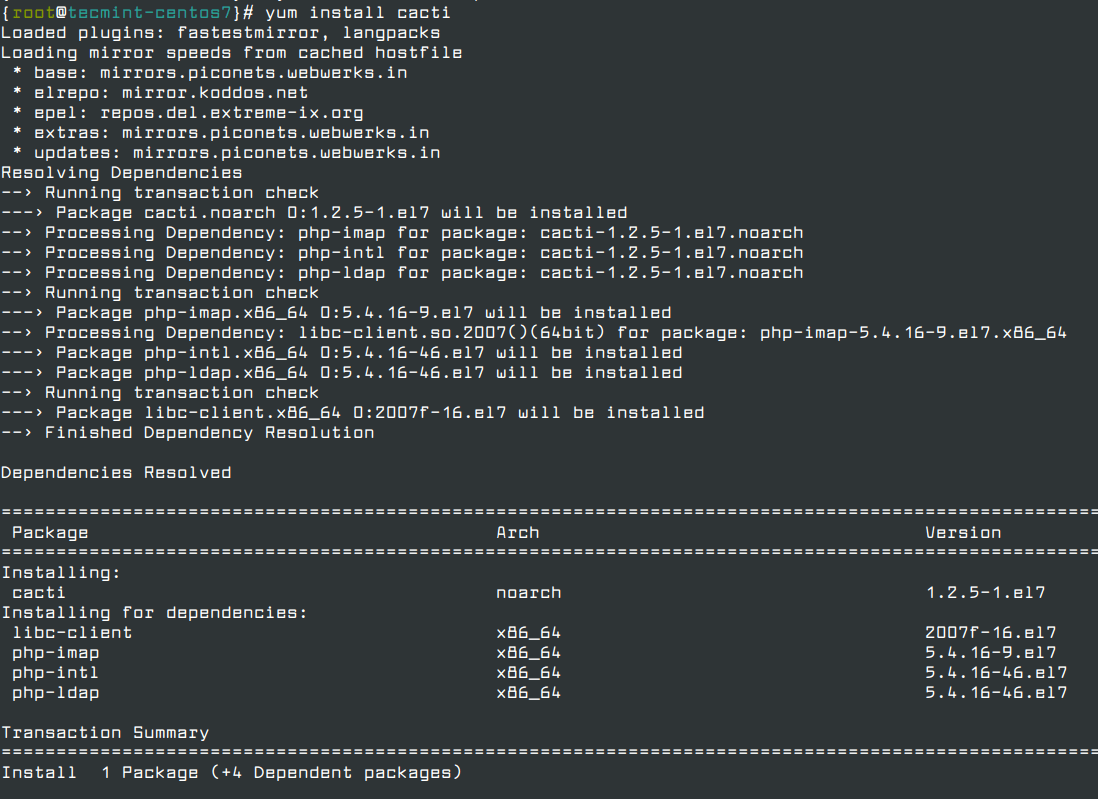
Installing Cacti Required Packages on RHEL / CentOS / Fedora
First, we need to install following dependency packages one-by-one using the default package manager tool as shown.
# yum install mysql mysql-server [On RHEL/CentOS 6]
MariaDB
is a community-developed fork of the MySQL database project and
provides a replacement for MySQL. Previously the official supported
database was MySQL under RHEL/CentOS and Fedora.
Recently, RedHat makes a new transaction from MySQL to MariaDB, as MariaDB is the default implementation of MySQL in RHEL/CentOS 8/7 and Fedora 19 onwards.
We need to configure MySQL for Cacti, to do this we need to secure a newly installed MySQL server and then we will create Cacti database with user Cacti. If you’re MySQL is already installed and secured, then don’t need to do it again.
# mysql_secure_installation
Create MySQL Cacti Database
Login into MySQL server with a newly created password and create Cacti database with user Cacti and set the password for it.
On RHEL/CentOS 6 and Fedora 18-12
[root@tecmint ~]# mysql -u root -p
Enter password:
Welcome to the MySQL monitor.  Commands end with ; or \g.
Your MySQL connection id is 3
Server version: 5.1.73 Source distribution
Copyright (c) 2000, 2013, Oracle and/or its affiliates. All rights reserved.
Oracle is a registered trademark of Oracle Corporation and/or its
affiliates. Other names may be trademarks of their respective
owners.

Type 'help;' or '\h' for help. Type '\c' to clear the current input statement.

mysql> create database cacti;
Query OK, 1 row affected (0.00 sec)

mysql> GRANT ALL ON cacti.* TO cacti@localhost IDENTIFIED BY 'tecmint';
Query OK, 0 rows affected (0.00 sec)

mysql> FLUSH privileges;
Query OK, 0 rows affected (0.00 sec)

mysql> quit;
Bye
On RHEL/CentOS 8/7 and Fedora 19 Onwards
[root@tecmint ~]# mysql -u root -p
Enter password:
Welcome to the MariaDB monitor.  Commands end with ; or \g.
Your MariaDB connection id is 3
Server version: 5.5.41-MariaDB MariaDB Server
Copyright (c) 2000, 2014, Oracle, MariaDB Corporation Ab and others.
Type 'help;' or '\h' for help. Type '\c' to clear the current input statement.

MariaDB [(none)]> create database cacti;
Query OK, 1 row affected (0.00 sec)

MariaDB [(none)]> GRANT ALL ON cacti.* TO cacti@localhost IDENTIFIED BY 'tecmint';
Query OK, 0 rows affected (0.00 sec)

MariaDB [(none)]> FLUSH privileges;
Query OK, 0 rows affected (0.00 sec)

MariaDB [(none)]> quit;
Bye
Install Cacti Tables to MySQL
Find out the database file path using RPM command, to install cacti tables into newly created Cacti database, use the following command.
# rpm -ql cacti | grep cacti.sql
Sample Output:
/usr/share/doc/cacti-1.2.6/cacti.sql
OR
/usr/share/doc/cacti/cacti.sql
Now we’ve of the location of Cacti.sql file, type the following command to install tables, here you need to type the Cacti user password.
[root@tecmint ~]# mysql -u cacti -p cacti < /usr/share/doc/cacti-0.8.8b/cacti.sql
Enter password:
Configure MySQL settings for Cacti
Open the file called /etc/cacti/db.php with any editor.
# vi /etc/cacti/db.php
Make the following changes and save the file. Make sure you set password correctly.
/* make sure these values reflect your actual database/host/user/password */
$database_type = "mysql";
$database_default = "cacti";
$database_hostname = "localhost";
$database_username = "cacti";
$database_password = "your-password-here";
$database_port = "3306";
$database_ssl = false;
Configuring Firewall for Cacti
On RHEL/CentOS 6 and Fedora 18-12
[root@tecmint ~]# iptables -A INPUT -p udp -m state --state NEW --dport 80 -j ACCEPT
[root@tecmint ~]# iptables -A INPUT -p tcp -m state --state NEW --dport 80 -j ACCEPT
[root@tecmint ~]# service iptables save
Open file called /etc/httpd/conf.d/cacti.conf with your choice of editor.
# vi /etc/httpd/conf.d/cacti.conf
You need to enable access to Cacti application for your local network or per IP level. For example, we’ve enabled access to our local LAN network 172.16.16.0/20. In your case, it would be different.
Alias /cacti    /usr/share/cacti

<Directory /usr/share/cacti/>
        Order Deny,Allow
        Deny from all
        Allow from 172.16.16.0/20
</Directory>
In the latest version of Apache (ex: Apache 2.4), you may need to change according to the following settings.
Alias /cacti    /usr/share/cacti

<Directory /usr/share/cacti/>
        <IfModule mod_authz_core.c>
                # httpd 2.4
                Require all granted
        </IfModule>
        <IfModule !mod_authz_core.c>
                # httpd 2.2
                Order deny,allow
                Deny from all
                Allow from all
        </IfModule>
</Directory>
Finally, restart the Apache service.
[root@tecmint ~]# service httpd restart    [On RHEL/CentOS 6 and Fedora 18-12]
[root@tecmint ~]# systemctl restart httpd.service  [On RHEL/CentOS 8/7 and Fedora 19 onwards]
Setting Cron for Cacti
Open file /etc/cron.d/cacti.
# vi /etc/cron.d/cacti
Uncomment the following line. The poller.php script runs every 5mins and collects data of known host which is used by Cacti application to display graphs.
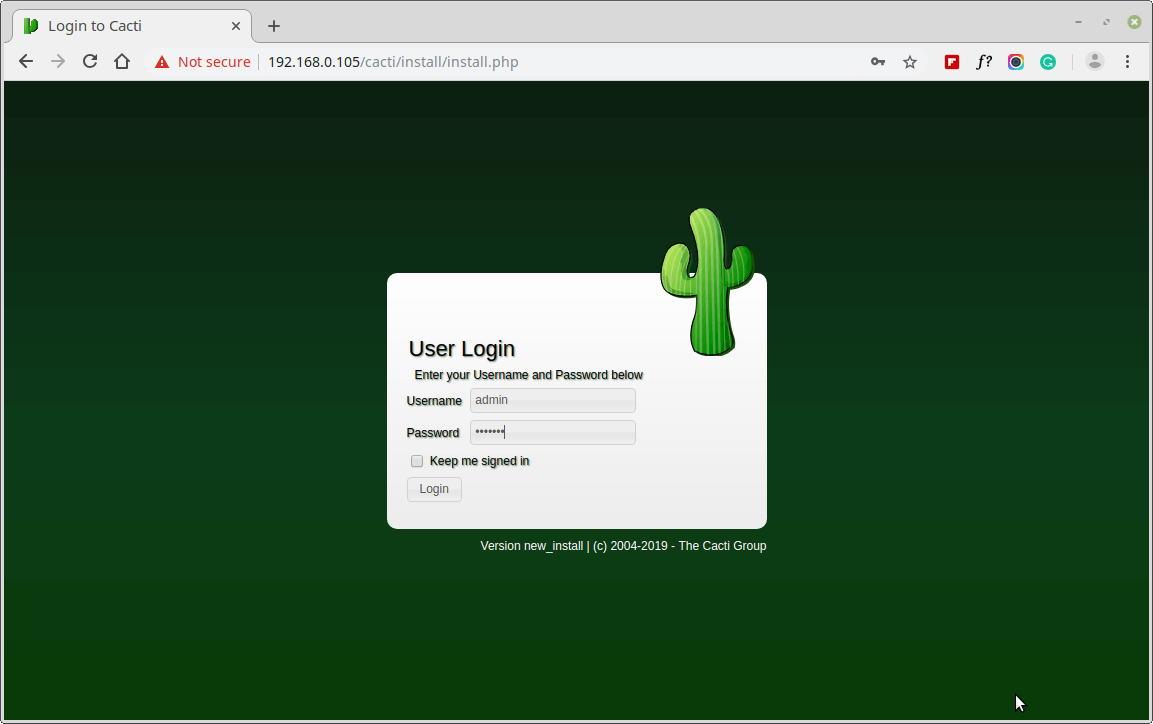
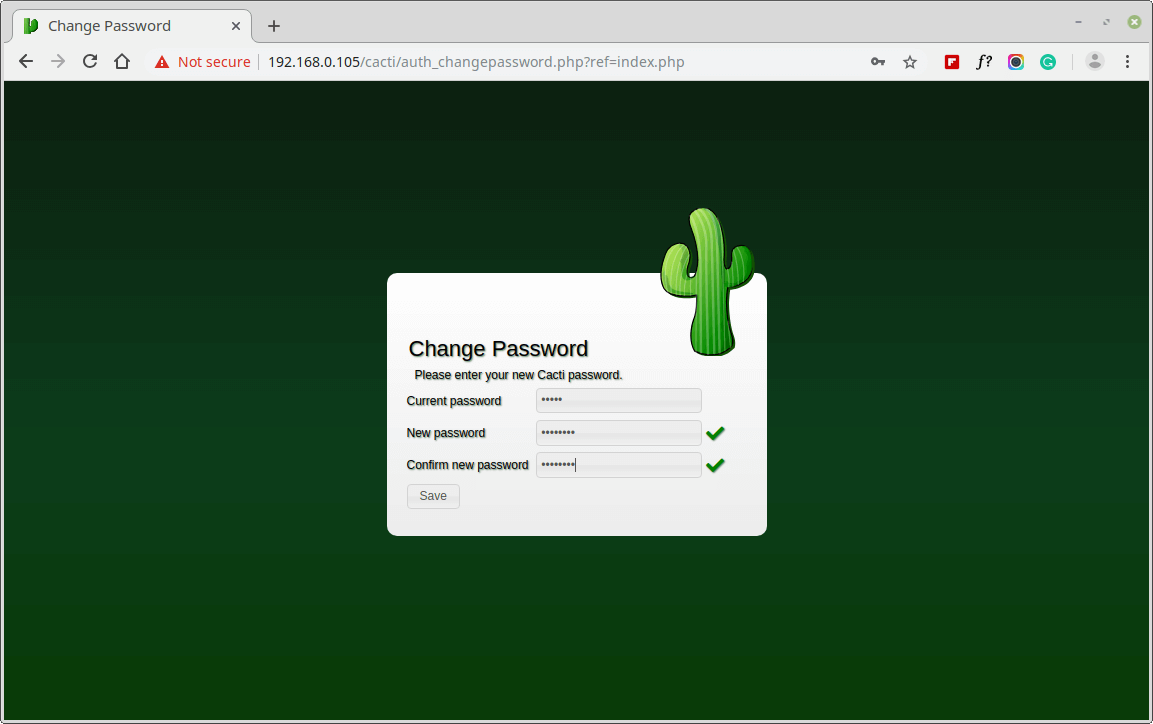
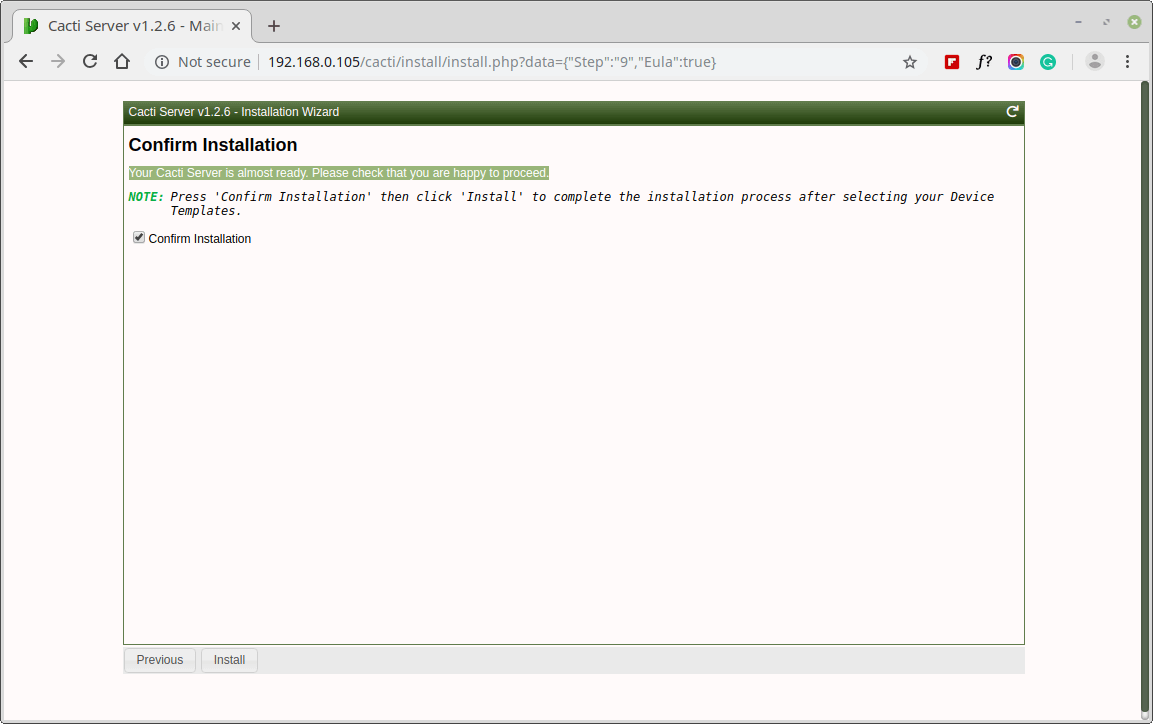
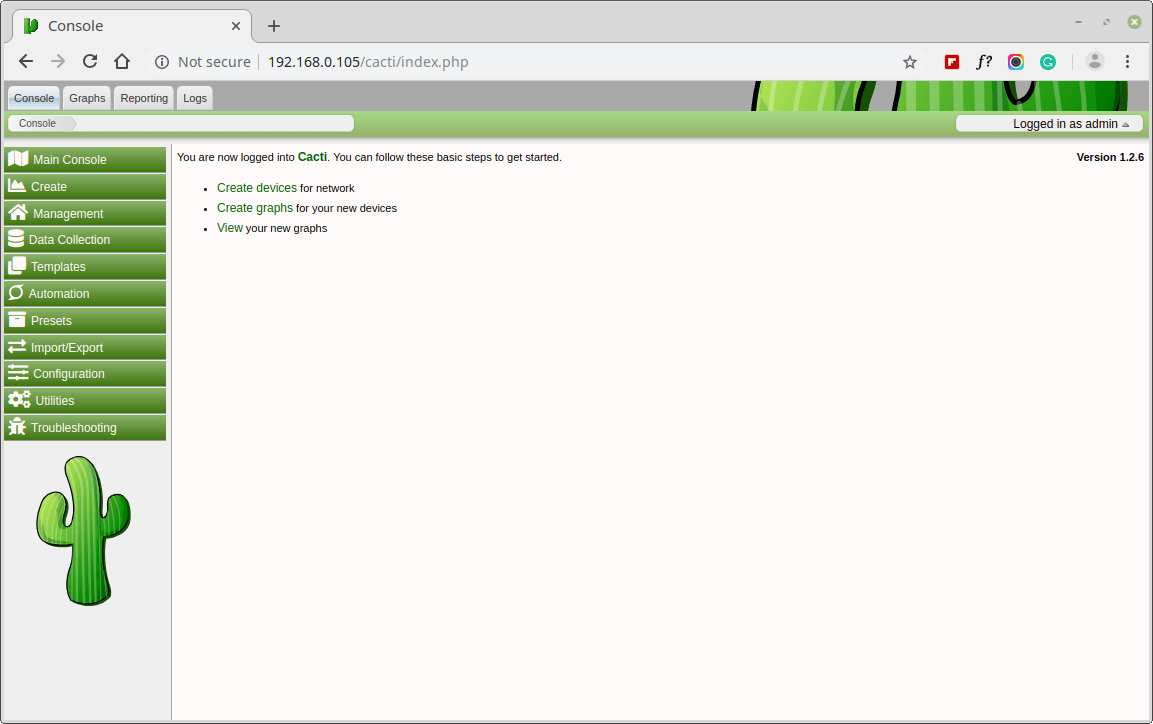
Finally, Cacti is ready, just go to http://YOUR-IP-HERE/cacti/ & follow the installer instruction through the following screens. Enter the default login details and hit Enter button.
User: admin
Password: admin
Cacti User Login
Next, change default Cacti password.
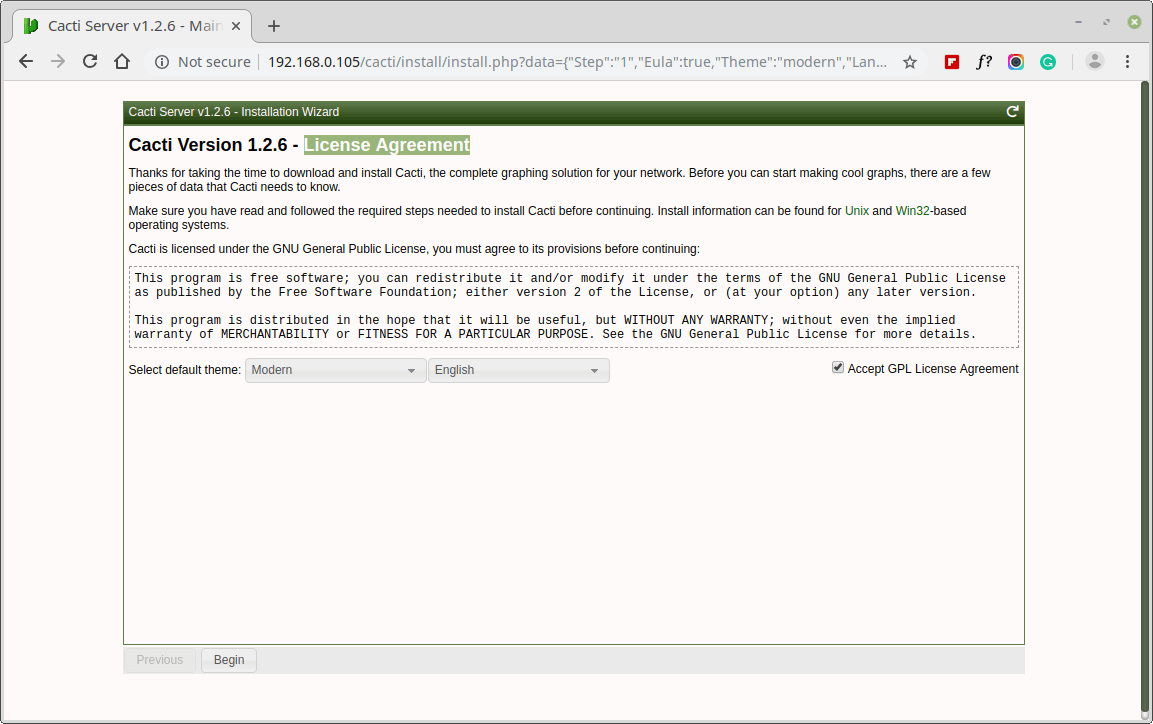
Accept Cacti License Agreement
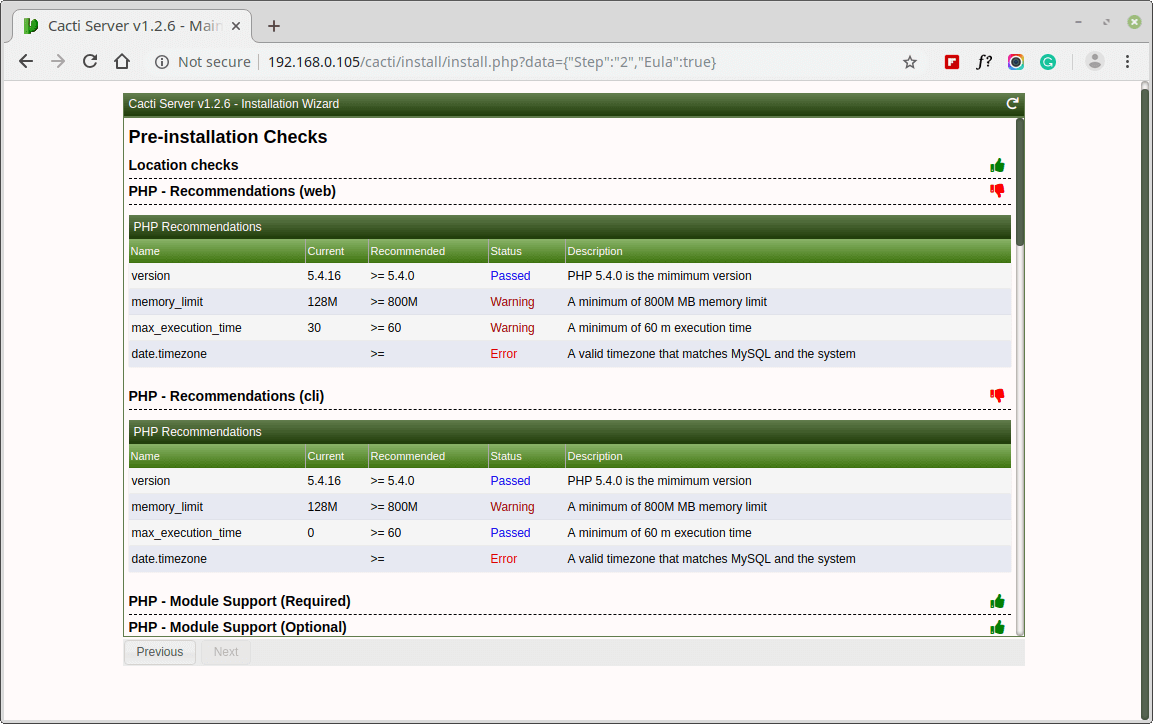
Next, the screen shows Pre-installation Checks for Cacti installation, please correct the suggested settings in your /etc/php.ini file as shown and restart Apache after making changes.
Cacti Pre-installation Checks
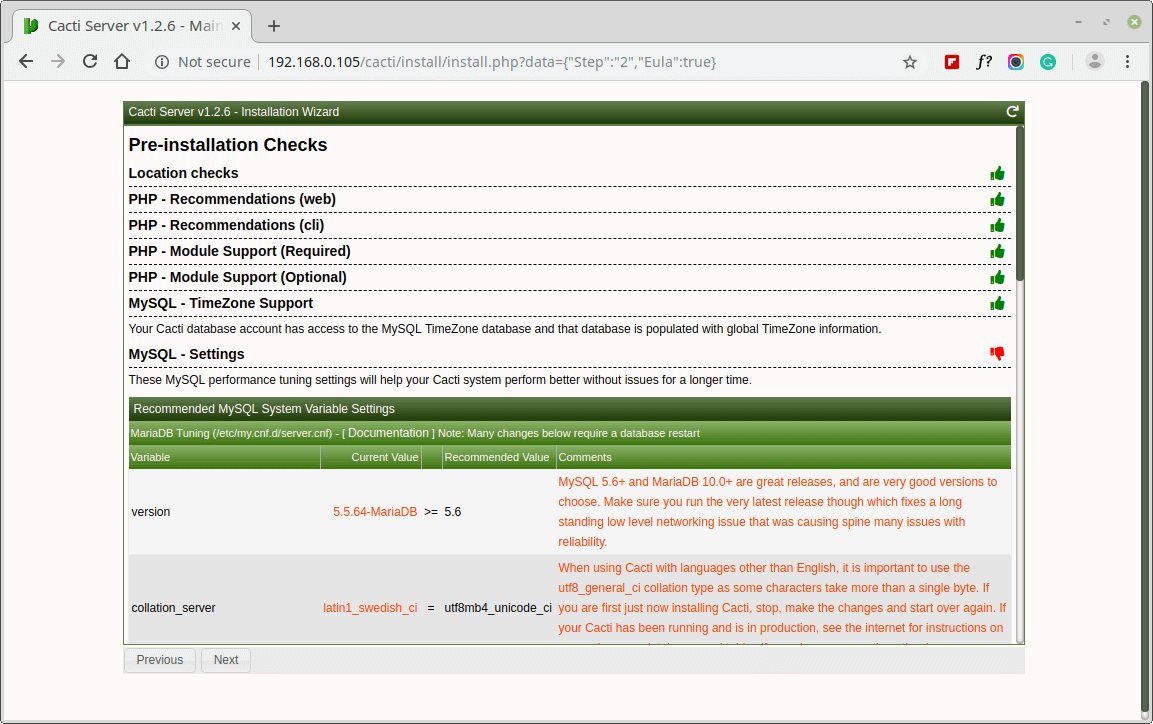
Similarly, you also need to grant access to the MySQL TimeZone
database for user Cacti, so that the database is populated with global
TimeZone information.
mysql> use mysql;
mysql> GRANT SELECT ON mysql.time_zone_name TO cacti@localhost;
mysql> flush privileges;
Cacti MySQL Pre-Installation Checks
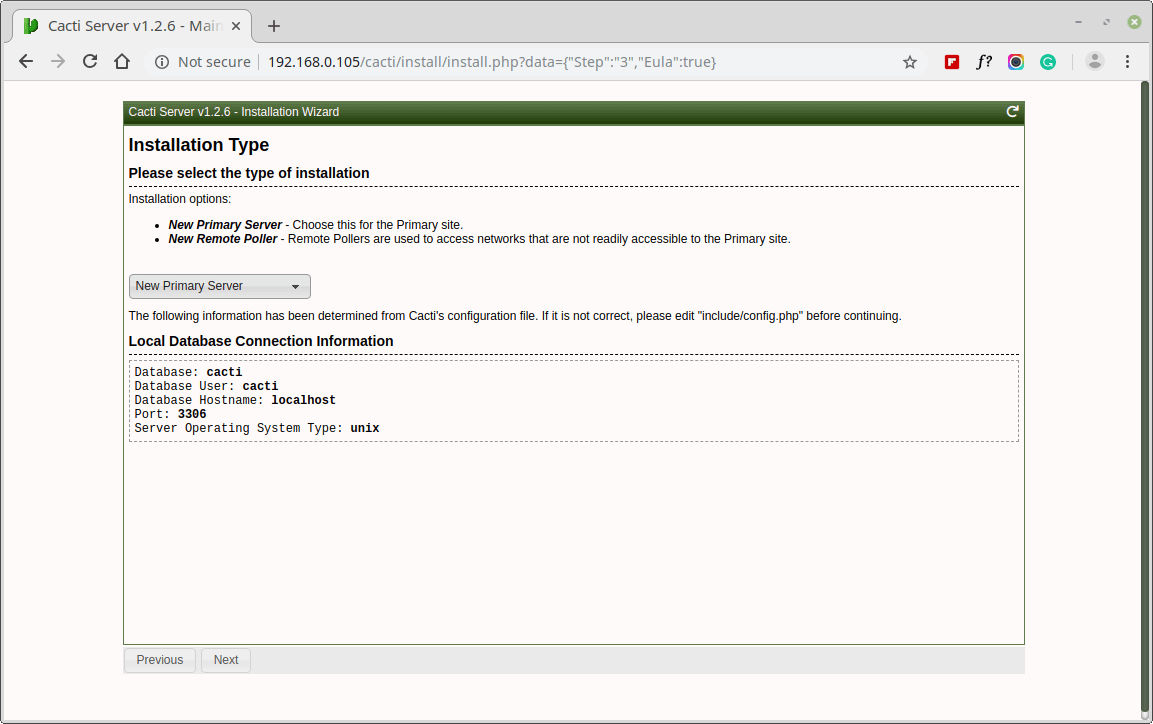
Please choose the installation Type as “New Install“.
Select Cacti Installation Type
Make sure all the following directory permissions are correct before continuing.
Cacti Directory Permission Checks
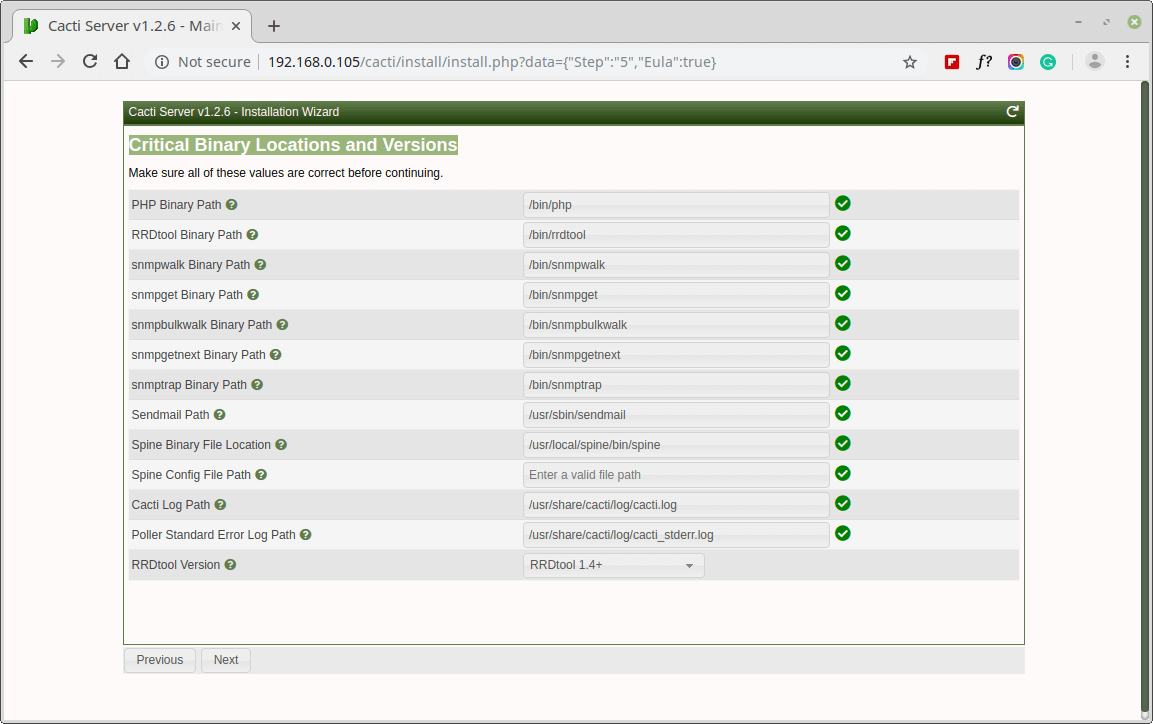
Make sure all of these Critical Binary Locations and Versions values are correct before continuing.
Critical Binary Locations and Versions
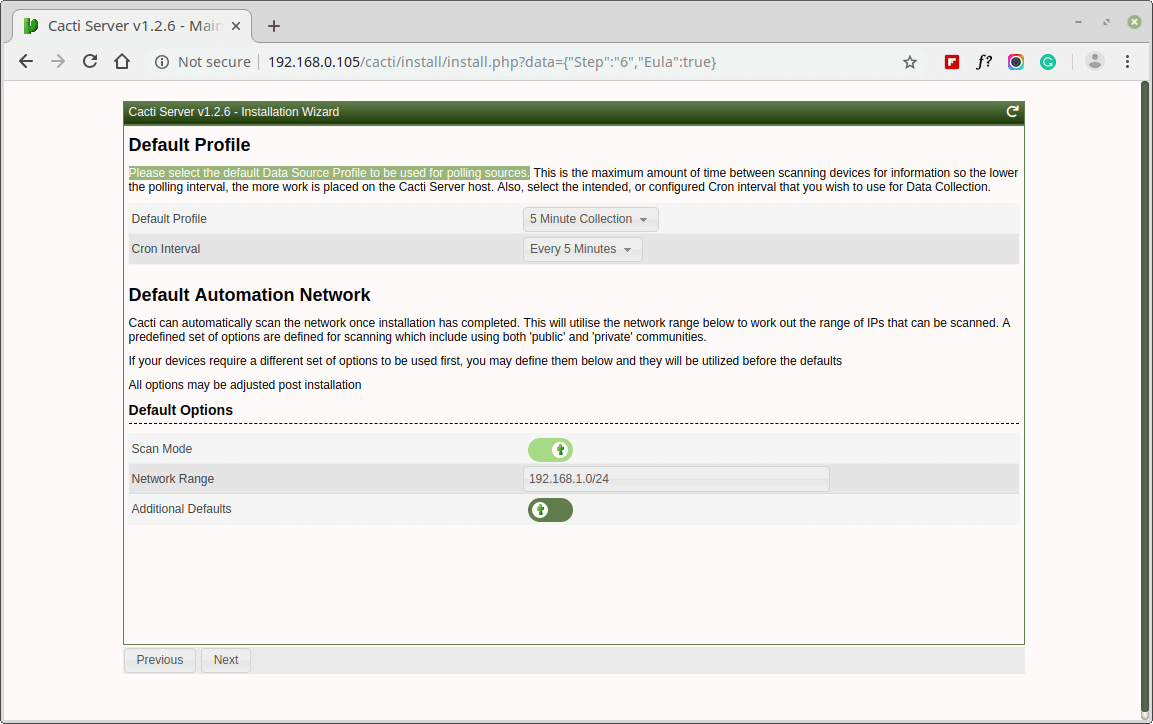
Please choose the default Data Source Profile to be used for polling sources.
Select Data Source Profile
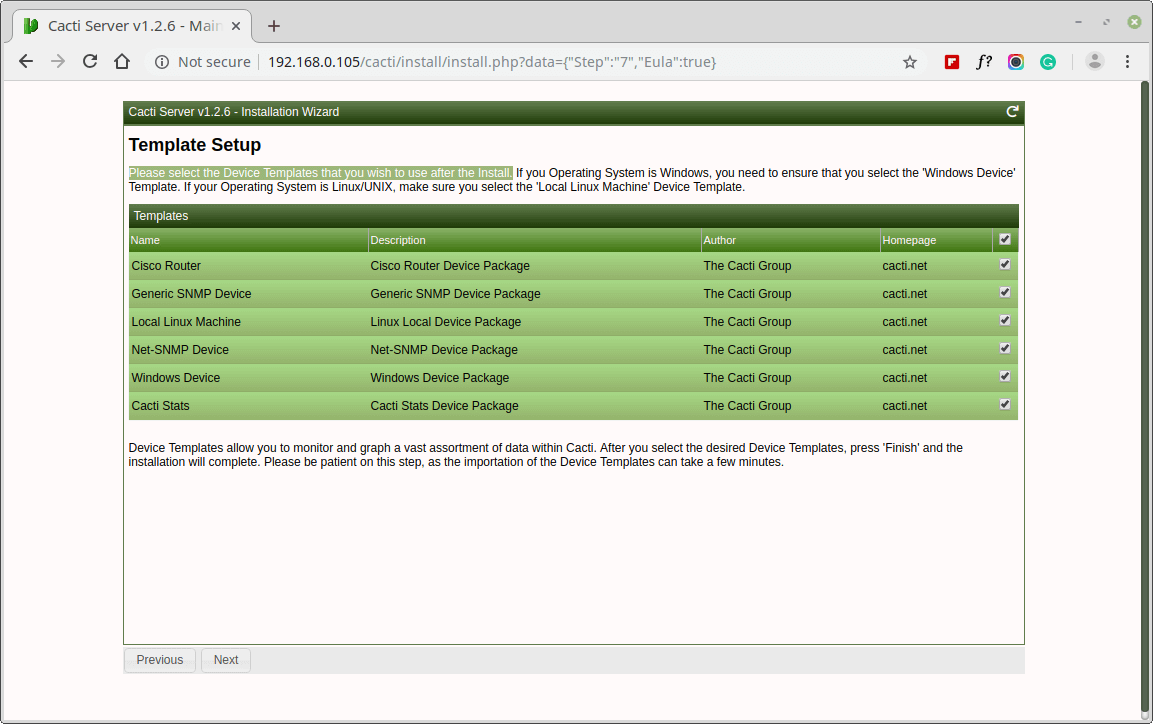
Please, choose the Device Templates that you wish to use after the Cacti Install.
Select Cacti Device Templates
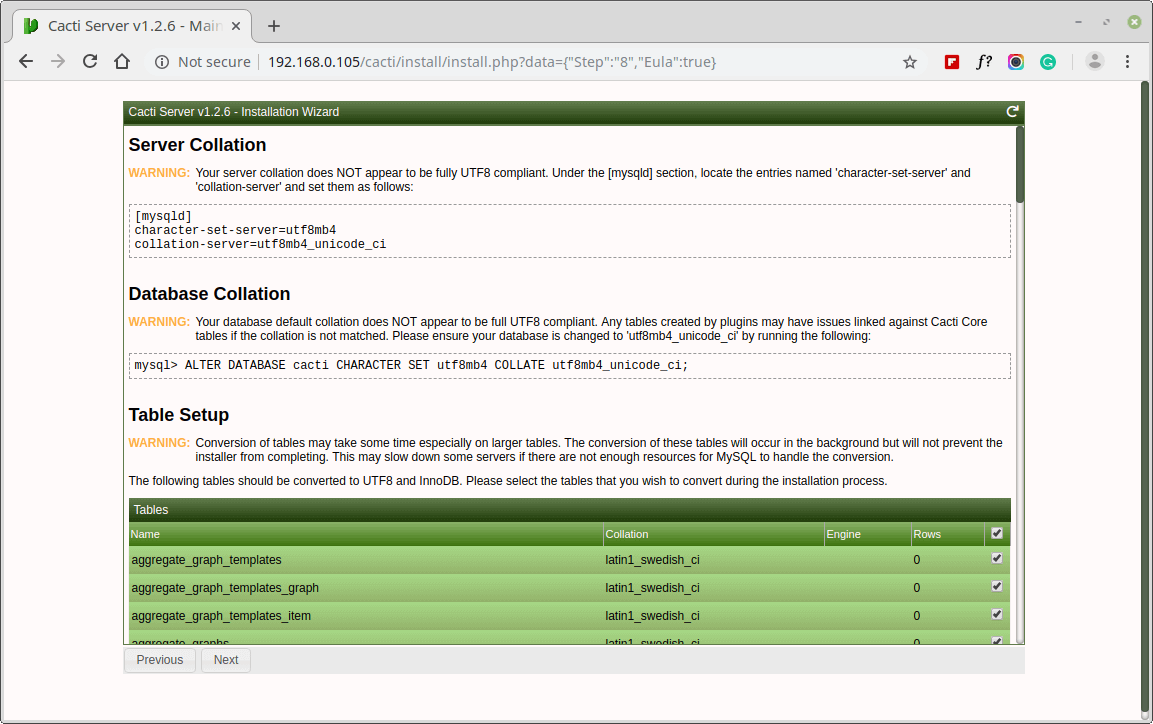
Set the Server Collation in your MySQL configuration file /etc/my.cnf under the [mysqld] section as shown.
Ada beberapa cara yang bisa teman-teman bisa coba untuk mengatasi
login page hotspot tidak otomati muncul, yang akan saya bahas pada
tutorial kali ini.
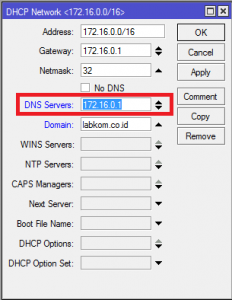
1. Kesalahan Konfigurasi DNS Server
Untuk membuat sebuah server hotspot teman-teman terlebih dahulu harus
membuat sebuah DHCP Server agar ketika ada device yang terhubung ke
Access Point bisa mendapatkan IP secara otomatis dari DHCP Server, bagi
teman-teman yang masih pemula terkadang ada saja konfigurasi yang
terlewat salah satunya DNS Server pada menu DHCP tidak di isi. Bagi
teman-teman yang membuat DHCP Server baru melalui DHCP Setup memang
kolom DHCP Server akan kosong jadi harus dtambahkan secara manual.
Untuk menambahkan DHCP Server caranya, buka menu IP –> DHCP Server –> pindah ke tab Networks, kemudian
pilih IP Server hotspot teman-teman. kemudian isi DNS Server, dan
biasanya menggunakan IP Gateway, seperti pada gambar dibawah ini:
2. Kesalahan Urutan NAT
Fungsi NAT pada mikrotik salah satunya berfungsi untuk meredirect,
login page tidak otomatis muncul bahkan sama sekali tidak muncul
walaupun sudah diketikan IP Server hotspot di browser, bisa terjadi
karena urutan default untuk Hotspot berubah, bisa karena kesalahan
seting atau penambahan rule baru di Firewall NAT. Untuk mengatasi
berubahnya urutan NAT untuk hotspot teman-teman bisa membuat ulang
server hotspot, dengan begitu urutan di Firewall NAT akan berbuah
menjadi default.
Caranya,buka menu IP –> Hotspot –> di tab server pilih server
hotspot kemudian klik kanan lalu remove. Setelah server hotspot di hapus
tambahkan server hotspot baru dengan konfigurasi sama seperti
sebelumnya, dengan begitu NAT untuk hotspot kembali ke default. Dan
pastikan rule tersebut berada di paling atas.
3. Tidak ada Koneksi Internet
Login page tidak otomatis muncul bisa karena tidak ada koneksi
internet, sebelumnya silahkan cek terlebih dahulu apakah Mikrotik
teman-teman memiliki koneksi internet atau tidak. hehe
4. Bug pada RouterOS
Pihak Mikrotik sendiri secara berkala melakukan pembaharuan atau
penambahan fiture, hal tersebut demi memperbaiki bug/error dan
meningkatkan keamanan pada RouterOS. Ada beberapa versi RouterOS dimana
login page tidak otomatis muncul itu karena Bug pada RouterOS
teman-teman bukan karena kesalahan setingan/konfigurasi, untuk mengatasi
hal tersebut teman-teman harus mendowngrade ke versi sebelumhya, atau mengUpgrade ke versi terbaru.
Berikut versi RouterOS yang terdapat Bug pada Hotspot:
Versi 6.45.6
Versi 6.46.2
Teman teman bisa menggunakan RouterOS versi 6.44.6 long term, yang saya pakai tidak ada kendala pada login page Hotspot yang tidak muncul otomatis.
Nah itulah 4 Cara Mengatasi Login Page Hotspot tidak Otomatis Muncul, bagi teman-teman yang telah mencoba ke-4 cara tersebut namun gagal, bisa berdiskusi di kolom komentar. Semoga bermanfaat.
Jack Wallen shows you how to make working with CentOS 7 iptables much easier with the help of an ncurses-based GUI.
If you manage a CentOS 7 GUI-less server, you probably
know that managing the firewall can be a bit of a hassle. Wouldn't it be
nice if there was a handy, ncurses-based tool to make this process a
bit easier? Oh wait, there is. That tool is system-config-firewall-tui.
With this tool, you can easily set a service/interface/port as trusted,
to allow incoming traffic to that port. Only those trusted elements will
be allowed in.
Out of the box, system-config-firewall-tui isn't
installed. I'm going to walk you through the process of installing the
tool, enabling it to run, and then using it to open a port or two. I'll
be demonstrating on CentOS7, but this tool is also available for Fedora
as well. This tool directly manages iptables rules, so having a simple
to use frontend for that is pretty important for some users. Don't get
me wrong, system-config-firewall-tui doesn't give you the massive power
of iptables (for that you really need to dive into the deep waters of
iptables), but it does make the basic task of opening ports (via
iptables) quick and easy.
Let's install and use system-config-firewall-tui.
Installation
The installation of the tool is pretty straightforward. Open up a terminal window and issue the command:
sudo yum install system-config-firewall-tui
That will install the tool. However, when you go to run the command sudo system-config-firewall-tui, you'll be warned that firewalld is running, thus preventing the tool from opening. To get around this, issue the commands:
The ncurses interface will open (Figure A).
You should immediately notice that the firewall isn't enabled. Tab to
the [ ] Enabled section and tap the keyboard spacebar to enable the
firewall. Figure A
You must enable the firewall to continue.
With the firewall enabled, you can now tab down to Customize. In the new window (Figure B), you can scroll through the list of services to allow through the firewall. Figure B
Our list of available services.
After you've enabled your services, tab down to Forward. This is not
port forwarding, rather the "Next" button. In the next screen (Figure C), you can add, edit, or remove additional ports. Figure C
Adding additional ports to be considered trusted.
If you tab to Add and hit Enter on your keyboard, you can then add a
single port or port range, as well as a protocol. Do note, the protocol
(tcp/udp) is required. Once you've taken care of that, tab to OK.
After you've added a custom port/protocol, tab down to Forward. In the
resulting window (Figure D), you can list an interface as trusted.
Figure D
Setting a trusted interface.
Enable as many interfaces as you need to be trusted and tab down to
Forward. In the next screen, you can enable ports for port forwarding.
Tab to Add and hit Enter on your keyboard. In the resulting screen (Figure E), enter the necessary source and destination information. Figure E
Setting up port forwarding.
In the next screen, you can mark ICMP types that should be rejected (Figure F). Enable each, from the list, and then tab to Forward, and tap your keyboard Enter key. Figure F
Rejecting ICMP types.
In the next window (Figure H), you can add custom rules if necessary. Figure H
Adding custom rules.
Tab to Forward and hit Enter. Once you've finished with the custom
rules, tab to OK and hit Enter. In the resulting screen, tab to Close
and hit Enter. You will find yourself on the first screen where you can
enable the firewall. Tab to OK and you will be warned that the new rules
will override the current set. Tab to Yes and tap Enter on your
keyboard. You've just created a new rule to the iptable chain, all with
the help of a user-friendly ncurses GUI. If you issue the command sudo
iptables -L you should see your new rules listed.
An easier route
Although system-config-firewall-tui isn't quite as flexible as working
directly with iptables, if you're not ready to take the plunge into
those deeper waters, this GUI is a much easier route to working with the
firewall system on CentOS 7. Give system-config-firewall-tui a go and
see if it doesn't turn into your go-to for the platform.
Pagi ini saya selesai memindahkan sistem dan database MySQL Server
dari sistem lama berupa server fisik IBM X Series 3400 ke Server
(sementara) HP Proliant ML. Server lama menggunakan sistem operasi
openSUSE 11.0 sedangkan server baru menggunakan SUSE Linux Enterprise
Server (SLES) 11 JeOS yang menjadi Xen Hypervisor Guest. Sistem fisik
dari HP Proliant ML ini menggunakan SLES 11 yang dioptimasi untuk
menjadi Xen Hypervisor host.
Mengingat database MySQL Server ini merupakan data yang paling urgent
dan digunakan oleh semua department, saya agak paranoid memindahkannya.
Proses ujicoba dilakukan selama 2 minggu dengan berbagai metode antara
lain :
Proses Dump SQL. Cara ini gagal karena salah satu
program aplikasi yaitu program aplikasi penggajian menggunakan data yang
dienkripsi. Data yang dienkripsi ini menggunakan karakter dan simbol
khusus yang membuat proses dumping menjadi kacau. Daripada satu group
perusahaan nggak gajian lebih baik saya batalkan opsi ini 🙂
Proses Sinkronisasi Database. Proses ini pernah
saya lakukan sewaktu memindahkan data SQL Server ke MySQL namun cara ini
juga tidak saya ambil karena prosesnya lama dan sinkronisasi hanya
berjalan pada tabel, sementara view, stored procedure dan trigger tidak
ikut serta.
Replikasi Database. Metodenya adalah menggunakan
model master & slave. Setiap perubahan data pada database master
akan langsung direplikasi ke database slave. Opsi ini tidak saya ambil
karena saya harus mengubah konfigurasi sistem. Opsi ini tetap menjadi
pilihan jika cara lain mengalami kegagalan
Manual Copy. Cara ini saya ambil karena salah satu
staff IT pernah berhasil melakukannya pada salah satu group perusahaan.
Metodenya menggunakan perintah rsync.
Berikut adalah detail proses pemindahan menggunakan sistem manual copy yang saya lakukan :
Siapkan server baru. Install sistem operasi dalam
modus seminimal mungkin, itu sebabnya saya menggunakan SLES dengan basis
JeOS (Just Enough Operating System), yang bahkan lebih minimalis
daripada sekedar install Text Mode
Install package MySQL Database Server di server baru. Saya melakukan instalasi dari DVD SLES 11 menggunakan perintah : zypper in mysql. Instalasi dapat juga dilakukan menggunakan yast
Jalankan Service MySQL Database Server di server baru. Jalankan dengan perintah : service mysql start.
Pada saat pertama kali dijalankan, MySQL akan membuat struktur data
untuk pertama kali. Setelah selesai, matikan kembali service MySQL
tersebut dengan perintah : service mysql stop
Shut down Service MySQL Induk. Kebetulan pada hari
Minggu malam tidak ada jadwal kegiatan yang menggunakan database, jadi
saya bisa ssh ke kantor untuk melakukan perintah service mysql stop dan kemudian melakukan rsync data ke server baru.
Salin Data. Saya menggunakan perintah rsync
untuk menyalin seluruh isi folder /var/lib/mysql dan kemudian
memindahkannya ke server baru. Sebagai tindakan berjaga-jaga, saya
menempatkan data ini tidak langsung ke /var/lib/mysql di server baru
melainkan di salah satu sub folder /srv. Sebagai catatan, saya juga menyalin file konfigurasi MySQL server lama yang ada di /etc/my.cnf.
Saat pertama kali mencoba, saya menyalin keseluruhan isi folder namun
ternyata service MySQL tidak dapat dijalankan. Saya mengulang proses
pemindahan namun membiarkan sub folder mysql (yang berisi tabel mysql,
user, hak akses dll) tidak tersentuh. Ternyata cara ini berhasil.
Service MySQL bisa dijalankan dan program aplikasi bisa mengaksesnya,
hanya saja saya perlu melakukan sinkronisasi data user dan hak akses
karena saya tidak menimpa folder data MySQL.
Setelah service MySQL Server berjalan dengan baik, ternyata masih ada
1 masalah tersisa, yaitu user tidak bisa menghapus atau membuat view
dengan pesan : Error code 13. Googling beberapa workaround tanpa hasil,
saya melakukan investigasi permission folder masing-masing database dan
ternyata ada database yang hak akses Read/Writenya dipegang oleh root.
Saya mengubah permission aksesnya dan masalahnya dapat terselesaikan.
Saat ini MySQL database server sudah dipergunakan sebagaimana biasanya.