Tuesday, 18 March 2014

FATAL ERROR: SLIC table pointer isn't what it should be (RSDT). Press any key to continue booting.

Pernah mengalaminya, saat install windows7 ?

setelah dicari penyebabnya ada dua yaitu:
1. karena memakai windows tidak original saat mengaktifkan crack terjadi crash dengan motherboards
2. disebabkan motherboards itu sendiri. Solusi pakai windows Xp atau ganti motherboards

Source : http://keisha-computer.blogspot.com/2013/08/fatal-error-slic-table-pointer-isnt.html

Sunday, 16 March 2014

SSH commands for Unifi

Once you are able to log in via SSH to the Unifi, there are several useful commands:
  • Reset AP to Factory Default
    syswrapper.sh restore-default
  • Manually Upgrade AP
    syswrapper.sh upgrade http://ip-of-controller:8080/dl/firmware/BZ2/2.3.8.1597/firmware.bin
  • Enter CLI
    mca-cli
  • Set Inform Server
    set-inform http://ip-of-controller:8080/inform
Source : http://www.wisp.net.au/commands-unifi-pm-22.html

Sunday, 9 March 2014

Mengenalkan MPASI Setelah Bayi Berusia 6 Bulan

Anda mulai bisa memperkenalkan MPASI (Makanan Pendamping Air Susu Ibu) kepada bayi Anda setelah ia berusia 6 bulan. Hingga usianya 6 bulan, asupan terbaik untuknya adalah ASI Eksklusif.
Ketika bayi sudah siap menerima MPASI, biasanya ia akan memberikan “sinyal”, alias tanda-tanda, diantaranya:
  • Kekuatan kepala: ia sudah bisa menahan kepalanya dalam posisi tegak dengan stabil.
  • Untuk bisa menyimpan makanan dalam mulutnya untuk kemudian ditelan, bayi harus mulai berhenti menggunakan lidahnya untuk mendorong makanan keluar dari mulutnya.
  • Duduk dengan baik sambil bersandar: untuk bisa menelan dengan baik, tentu saja bayi harus sudah bisa duduk dengan tegak, walaupun dengan bersandar.
  • Pada sebagian bayi, seringkali mereka akan terlihat “kelaparan”, walaupun sudah 8-10 minum ASI/Sufor dalam sehari.
  • Mulai tertarik dengan makanan Anda
Baca juga artikel terkait tentang makanan pertama bayi dan tuntunan membuat makanan bayi sendiri.

Hal yang perlu diperhatikan dalam pengenalan MPASI adalah sebagai  berikut:

  1. MPASI diberikan sedikit demi sedikit, misalnya 2 -3 sendok pada saat pertama, dan jumlahnya bisa ditambah seiring perkembangan bayi, agar terbiasa dengan teksturnya.
  2. Pemberian MPASI dilakukan di sela-sela pemberian ASI dan dilakukan secara bertahap pula. Misalnya untuk pertama 1 kali dalam sehari, kemudian meningkat menjadi 3 kali dalam sehari.
  3. Tepung beras sangat baik digunakan sebagai bahan MPASI karena sangat kecil kemungkinannya menyebabkan alergi pada bayi. Tepung beras yang baik adalah yang berasal dari beras pecah kulit yang lebih banyak kandungan gizinya.
  4. Pengenalan sayuran sebaiknya didahulukan daripada pengenalan buah, karena rasa buah yang lebih manis lebih disukai bayi, sehingga jika buah dikenalkan terlebih dahulu, dikhawatirkan akan ada kecenderungan bayi untuk menolak sayur yang rasanya lebih hambar. Sayur dan buah yang dikenalkan pun hendaknya dipilih yang mempunyai rasa manis.
  5. Hindari penggunaan garam dan gula. Utamakan memberikan MPASI dengan rasa asli makanan, karena bayi usia 6-7 bulan, fungsi ginjalnya belum sempurna. Untuk selanjutnya, gula dan garam bisa ditambahkan tetapi tetap dalam jumlah yang sedikit saja. Sedangkan untuk merica bisa ditambahkan setelah anak berusia 2 tahun.
  6. Untuk menambah cita rasa, MPASI bisa menggunakan kaldu ayam, sapi, atau ikan yang Anda buat sendiri, serta bisa juga disertakan berbagai bumbu seperti daun salam, daun bawang, seledri.
  7. Jangan terlalu banyak mencampur banyak jenis makanan pada awal pemberian MPASI, namun cukup satu per satu saja. Berikan dulu dalam 2-4 hari untuk mengetahui reaksi bayi terhadap setiap makanan yang diberikan, untuk mengetahui jika ia memiliki alergi terhadap makanan tertentu.
  8. Perhatikan bahan makanan yang sering menjadi pemicu alergi seperti telur, kacang, ikan, susu dan gandum.
  9. Telur bisa diberikan kepada bayi sejak umur 6 bulan, tetapi pemberiannya bagian kuning terlebih dahulu, karena bagian putih telur dapat memicu reaksi alergi.
  10. Madu sebaiknya diberikan pada bayi usia lebih dari 1 tahun karena madu seringkali mengandung suatu jenis bakteri yang bisa menghasilkan racun pada saluran cerna bayi yang dikenal sebagai toksin botulinnum (infant botulism).
  11. Pengolahan MPASI harus higienis dan alat yang digunakan juga diperhatikan kebersihannya.

Tahapan pengenalan MPASI:

Mulai usia 6 bulan
Tekstur makanan : semi cair.
Mulailah dengan makanan lunak seperti biskuit yang diencerkan pakai air atau susu. Kenalkan pula bubur susu dalam jumlah sedikit demi sedikit. Bubur susu sebaiknya dibuat sendiri dari tepung beras yang dicampur dengan ASI atau susu formula. Untuk pengenalan rasa, selingi dengan tepung beras merah, kacang hijau, atau labu kuning.
Mulai pemberian sayuran yang dijus, kemudian buah yang dhaluskan atau di jus. Sayur dan buah yang disarankan yaitu: zicchini, pisang, pir, alpukat, jeruk.
Pemberian ASI atau susu formula di selang seling waktu makan utama.Untuk kebutuhan susu/cairan dihitung dari kebutuhan cairan per usia dan berat badan bayi. Kebutuhan cairan pada usia bayi trimester pertama sekitar 150cc/hari/berat badan.Trimester kedua sebesar 125cc/kg BB/hr dan trimester ketiga 110 cc/kg BB/hr.Contoh usia 12 bulan bb 10 kg, kebutuhan cairan sebesar 110 cc x 10 kg = 1.100 cc

Mulai usia 7 bulan
Perkenalkan dengan tekstur yang lebih kasar (semi padat) yaitu bubur tim saring. Coba terus seandainya bayi menolak atau muntah karena tahapan ini harus dilaluinya. Jika tidak nanti bayi akan malas mengunyah.
Perhatikan asupan zat besi seperti hati sapi karena di usia ini cadangan zat besi bayi mulai berkurang.
Setelah secara bertahap pemberian tim saring, bayi bisa dikenalkan dengan nasi tim tanpa disaring.
Jenis sayur dan buah yang disarankan: asparagus, wortel, bayam, sawi, bit, lobak, kol, mangga, blewah, timun suri, peach.
Bisa juga ditambahkan ayam, sapi, hati ayam/sapi, tahu, tempe.

Mulai usia 9 bulan
Mulai dikenalkan dengan bubur beras atau nasi lembek, lauk pauk dengan sayuran seperti sup.
Pada usia lebih dari 1 tahun, anak sudah bisa mengkonsumsi makanan keluarga.

Contoh Jadwal Pemberian MPASI

Sebagai acuan, untuk memberikan MPASI kepda si kceil, Anda bisa melihat jadwal di bawah ini. Jadwal ini bukan acuan baku lho, hanya untuk memberikan gambaran. Silahkan sesuaikan dengan kondisi buah hati Anda…

Untuk Bayi Usia 6-7 bulan:
06.00 : ASI/ susu formula.
08.00 : biskuit yang diencerkan dengan air/ASI/susu formula.
10.00 : buah.
12.00 : bubur susu.
13.00 : ASI/ susu formula.
14.00 : biskuit yang diencerkan dengan air/ ASI/ susu formula.
16.00 : ASI/ susu formula.
18.00: Bubur susu.
19.00 : ASI/susu formula.

Untuk Bayi Usia 7-8 bulan:
06.00 : ASI/ susu formula.
08.00 : biskuit/ bubur susu.
10.00 : buah.
12.00 : bubur saring.
13.00 : ASI/ susu formula.
14.00 : bubur susu.
16.00 : ASI/ susu formula.
18.00 : bubur saring.
19.00 : ASI / susu formula.

Untuk Bayi Usia 9-12 bulan:
06.00 : ASI/ susu formula.
08.00 : bubur susu.
10.00 : buah.
12.00 : bubur tim/ nasi lembek.
13.00 : ASI/ susu formula.
14.00 : bubur susu/ biskuit/ snack.
16.00 : ASI/ susu formula.
18.00 : Nasi tim/ nasi lembek.
19.00 : ASI/ susu formula.

Apa Tanda Si Kecil Sudah Kenyang?

Berikut tanda-tanda yang bisa menjadi ukuran ketika bayi Anda kenyang…
  1. Duduk bersandar di kursinya
  2. Berpaling setiap kali Anda sodorkan makanan
  3. Mulai memainkan makanan atau sendoknya
  4. Tidak mau membuka mulutnya
Source : http://www.tipsbayi.com/mengenalkan-mpasi-setelah-bayi-berusia-6-bulan.html

Kumpulan Menu MPASI 6 - 12 bulan

Pure Labu Kuning
Bahan:
  • ¼ labu kuning (labu parang)
  • 2-3 potong brokoli
  • Asi secukupnya
Cara membuat:
  • Bersihkan labu
  • Cuci bersih brokoli, rendam air garam sebentar lalu cuci lagi
  • Rebus Labu, saat sudah setengah matang, masukkan brokoli; masak sampai matang
  • Blender labu, brokoli dan asi; saring; sajikan
Note: brokoli/wortel bisa diganti dengan ikan teri basah/salmon

Pure kentang
Bahan:
  • 1 kentang besar / 2 kentang kecil
  • 2-3 potong brokoli / wortel secukupnya
  • Asi secukupnya
Cara membuat:
  • Bersihkan kentang
  • Cuci bersih brokoli, rendam air garam sebentar lalu cuci lagi (bila wortel, setelah di bersihkan cukup di cuci saja)
  • Rebus kentang, saat sudah setengah matang, masukkan brokoli/wortel; masak sampai matang
  • Blender kentang, brokoli/wortel dan asi; saring; sajikan
  • Note: brokoli/wortel bisa diganti dengan ikan teri basah/salmon

Pure Ubi Ungu/ Ubi Jalar
Bahan:
  • - 1 ubi ungu/ubi jalar besar
  • - 2-3 potong brokoli / wortel secukupnya
  • - Asi secukupnya
Cara membuat:
  • - Bersihkan ubi ungu/ubi jalar
  • - Cuci bersih brokoli, rendam air garam sebentar lalu cuci lagi (bila wortel, setelah di bersihkan cukup di cuci saja)
  • - Rebus ubi, saat sudah setengah matang, masukkan brokoli/wortel; masak sampai matang
  • - Blender ubi, brokoli/wortel dan asi; saring; sajikan
Note: brokoli/wortel bisa diganti dengan ikan teri basah/salmon

Pure pisang
Bahan:
  • - 1 buah Pisang
  • - 1 buah jeruk manis
Cara membuat:
  • - Pisang dikupas dan di haluskan
  • - Jeruk di potong dan peras
  • - Campur pisang dan jeruk; sajikan

Pure melon
Bahan:
  • - 4 iris sedang buah melon
Cara membuat:
  • - Kupas dan buang biji melon.
  • - Haluskan.

Pure pepaya jeruk
Bahan:
  • - 1 iris sedang pepaya
  • - 1 buah jeruk
Cara membuat:
  • - Pepaya di kupas dan di cuci, potong kecil-kecil. Masukkan potongan ke dalam air hangat
  • - Jeruk di potong dan di peras.
  • - Blender pepaya dan jeruk; sajikan

Pure apel
Bahan:
  • - 1 buah apel manis matang
  • - Asi secukupnya
Cara membuat:
  • - Apel dikupas, buang bagian tengah, cuci sampai bersih, potong 4 bagian
  • - Kukus di atas api sedang 5-10 menit
  • - Angkat dan tiriskan. Setelah dingin, blender dengan asi; sajikan

Nasi tim ayam
Bahan:
  • - Beras hitam dan beras merah (perbandingan 1:1 atau ½ sendok makan beras hitam, ½ sendok makan beras merah)
  • - Fillet dada ayam kampung
  • - 2-3 potong brokoli/wortel
  • - Sejumput kacang merah
  • - Asi secukupnya
Cara membuat:
  • - Bersihkan fillet dada ayam; tiriskan
  • - Cuci bersih brokoli, rendam air garam sebentar lalu cuci lagi (bila wortel, setelah di bersihkan cukup di cuci saja)
  • - Cuci beras merah dan beras hitam; masak dengan api sedang
  • - Bila beras sudah setengah matang, tambahkan air
  • - Masukkan fillet dada ayam, brokoli/wortel, kacang merah; masak dengan api kecil
  • - Bila sudah masak, blender semua bahan2 + asi; saring; sajikan
Note: bila masih ada airnya, jangan dibuang. Berikan kaldu saat anak disuapi nasi tim saring

Nasi tim ikan salmon
Bahan:
  • - Beras hitam dan beras merah (perbandingan 1:1 atau ½ sendok makan beras hitam, ½ sendok makan beras merah)
  • - 2-3 potong fillet ikan salmon
  • - Segenggam bayam hijau
  • - Sejumput kacang merah
  • - Asi secukupnya
Cara membuat:
  • - Bersihkan fillet ikan salmon; tiriskan
  • - Cuci bayam hijau dan kacang merah; tiriskan
  • - Cuci beras merah dan beras hitam; masak dengan api sedang
  • - Bila beras sudah setengah matang, tambahkan air
  • - Masukkan fillet ikan salmon, bayam hijau, kacang merah; masak dengan api kecil
  • - Bila sudah masak, blender semua bahan2 + asi; saring; sajikan

Nasi tim merah
Bahan:
  • - Beras hitam dan beras merah (perbandingan 1:1 atau ½ sendok makan beras hitam, ½ sendok makan beras merah)
  • - Segenggam bayam merah
  • - Sejumput kacang merah
  • - sejumput ikan teri medan basah
  • - Asi secukupnya
Cara membuat:
  • - Cuci bayam merah; tiriskan
  • - Cuci teri medan basah; tiriskan
  • - Cuci beras merah dan beras hitam; masak dengan api sedang
  • - Bila beras sudah hampir matang, tambahkan air
  • - Masukkan kacang merah dan teri basah
  • - Bila sudah matang, masukkan bayam merah; masak sampai bayam merah matang (cukup sebentar saja supaya gizinya tidak hilang)
  • - Bila sudah masak, blender semua bahan2 + asi; saring; sajikan

Nasi tim sehat
Bahan:
  • - Beras hitam dan beras merah (perbandingan 1:1 atau ½ sendok makan beras hitam, ½ sendok makan beras merah)
  • - Segenggam bayam hijau
  • - 2-3 potong brokoli
  • - 2-3 potong wortel
  • - Sejumput kacang merah
  • - Sejumput teri medan basah
  • - Asi secukupnya
Cara membuat:
  • - Cuci bayam hijau; tiriskan
  • - Cuci bersih brokoli, rendam air garam sebentar lalu cuci lagi; tiriskan
  • - Cuci bersih wortel; tiriskan
  • - Cuci bersih kacang merah; tiriskan
  • - Cuci bersih teri medan basah; tiriskan
  • - Cuci beras merah dan beras hitam; masak dengan api sedang
  • - Bila beras sudah setengah matang, tambahkan air
  • - Masukkan wortel, kacang merah, teri medan basah; setelah hampir masak, masukkan bayam hijau masak sampai bayam hijau matang (cukup sebentar saja supaya gizinya tidak hilang)
  • - Bila sudah masak, blender semua bahan2 + asi; saring; sajikan

Pasta
Bahan:
  • - segenggam macaroni
  • - ½ potong tomat
  • - 2-3 potong wortel
  • - 2-3 potong fillet ikan salmon
  • - Sejumput kacang merah
  • - Asi secukupnya
Cara membuat:
  • - Cuci bersih fillet ikan salmon tomat, wortel dan kacang merah; tiriskan
  • - Cuci bersih macaroni; masak dengan api sedang
  • - Bila macaroni hampir matang, masukkan fillet ikan salmon tomat, wortel dan kacang merah
  • - Bila sudah masak, blender semua bahan2 + asi; saring; sajikan

Nasi tim daging giling
Bahan:
  • - Beras hitam dan beras merah (perbandingan 1:1 atau ½ sendok makan beras hitam, ½ sendok makan beras merah)
  • - Sejumput daging sapi giling
  • - 2-3 potong brokoli
  • - Sejumput kacang merah
  • - Asi secukupnya
Cara membuat:
  • - Cuci bersih daging sapi giling; tiriskan
  • - Cuci bersih brokoli, rendam air garam sebentar lalu cuci lagi; tiriskan
  • - Cuci bersih kacang merah; tiriskan
  • - Cuci beras merah dan beras hitam; masak beras dan daging sapi giling dengan api sedang
  • - Bila beras sudah setengah matang, tambahkan air sedikit
  • - Masukkan kacang merah; bila hampir matang, masukkan brokoli
  • - Bila sudah masak, blender semua bahan2 + asi; saring; sajikan
Note: bila masih ada airnya, jangan dibuang. Berikan kaldu saat anak disuapi nasi tim saring

Nasi tim tahu
Bahan:
  • - Beras hitam dan beras merah (perbandingan 1:1 atau ½ sendok makan beras hitam, ½ sendok makan beras merah)
  • - 1 buah tahu cina
  • - ½ tomat
  • - 2-3 potong ikan salmon fillet
Cara membuat:
  • - Cuci bersih ikan salmon fillet
  • - Tomat di bersihkan bijinya dan di cuci bersih
  • - Cuci beras merah dan beras hitam; masak beras dan daging sapi giling dengan api sedang
  • - Bila beras sudah setengah matang, masukkan ikan salmon fillet
  • - Bila beras hampir matang, masukkan tomat dan tahu
  • - Bila sudah masak, blender semua bahan2 + asi; saring; sajikan

Bubur beras merah dan kacang hijau
Bahan:
  • - Beras merah 1 sdk makan
  • - Kacang hijau 1 sdk makan
  • - Segenggam daun bayam hijau
  • - 1 potong tomat
  • - 2-3 potong wortel
  • - Asi secukupnya
Cara membuat:
  • - Bayam , wortel di cuci bersih; tiriskan
  • - Tomat di bersihkan bijinya dan di cuci bersih; tiriskan
  • - Cuci beras merah dan kacang hijau; masak beras, kacang hijau dan wortel dengan api sedang
  • - Bila beras merah dan kacang hijau hampir masak, masukkan bayam dan tomat
  • - Bila sudah masak, blender semua bahan2 + asi; saring; sajikan

Kaldu Sayuran
Resep kaldu sayuran yang tujuannya juga sama, bikin makanan si kecil tetep enak meskipun gak pake gula garam. Fresh from the oven dan home made yang pastinya lebih sedap dan sehat.
Bahan-bahan :
  • 500 gr tulang ayam, ambil tulang punggung
  • 1 liter air
  • 1 buah wortel, potong-potong
  • 1/2 bawang bombay ukuran besar, iris-iris kasar
  • 2 lembar daun salam
  • 2 batang seledri, iris kasar
Cara membuat :
  1. Didihkan air, kemudian masukkan tulang ayam. Rebus terus dengan api kecil sampai tersisa 750 ml air.
  2. Masukkan semua bahan lain, lanjutkan merebus selama 15 menit.
  3. Angkat dan saring.
  4. Kaldu siap dipakai atau disimpan sebagai stok.

Kaldu Kaki Ayam
Resep kaldu kaki ayam untuk meningkatkan cita rasa makanan si kecil, biarpun walo gak pake gula garam rasa tetep enaaak….
Bahan-bahan :
  • 5 buah kaki ayam
  • 1 liter air
  • 1 batang daun bawang, iris halus
  • 1 buah tomat, iris halus
  • 2 lembar daun salam
  • 2 btg seledri
Cara membuat :
  1. Didihkan air, masukkan kaki ayam dan rebus dengan api kecil hingga air tersisa 3/4 nya (750 ml)
  2. Masukkan bahan lain dan lanjutkan merebus selama 15 menit.
  3. Angkat dan saring.
  4. Kaldu siap dipakai atau disimpan sebagai stok
Source :http://resep-makanan-menyehatkan.blogspot.com/2013/05/kumpulan-menu-mpasi-6-12-bulan.html

resep mpasi 6-7 bln

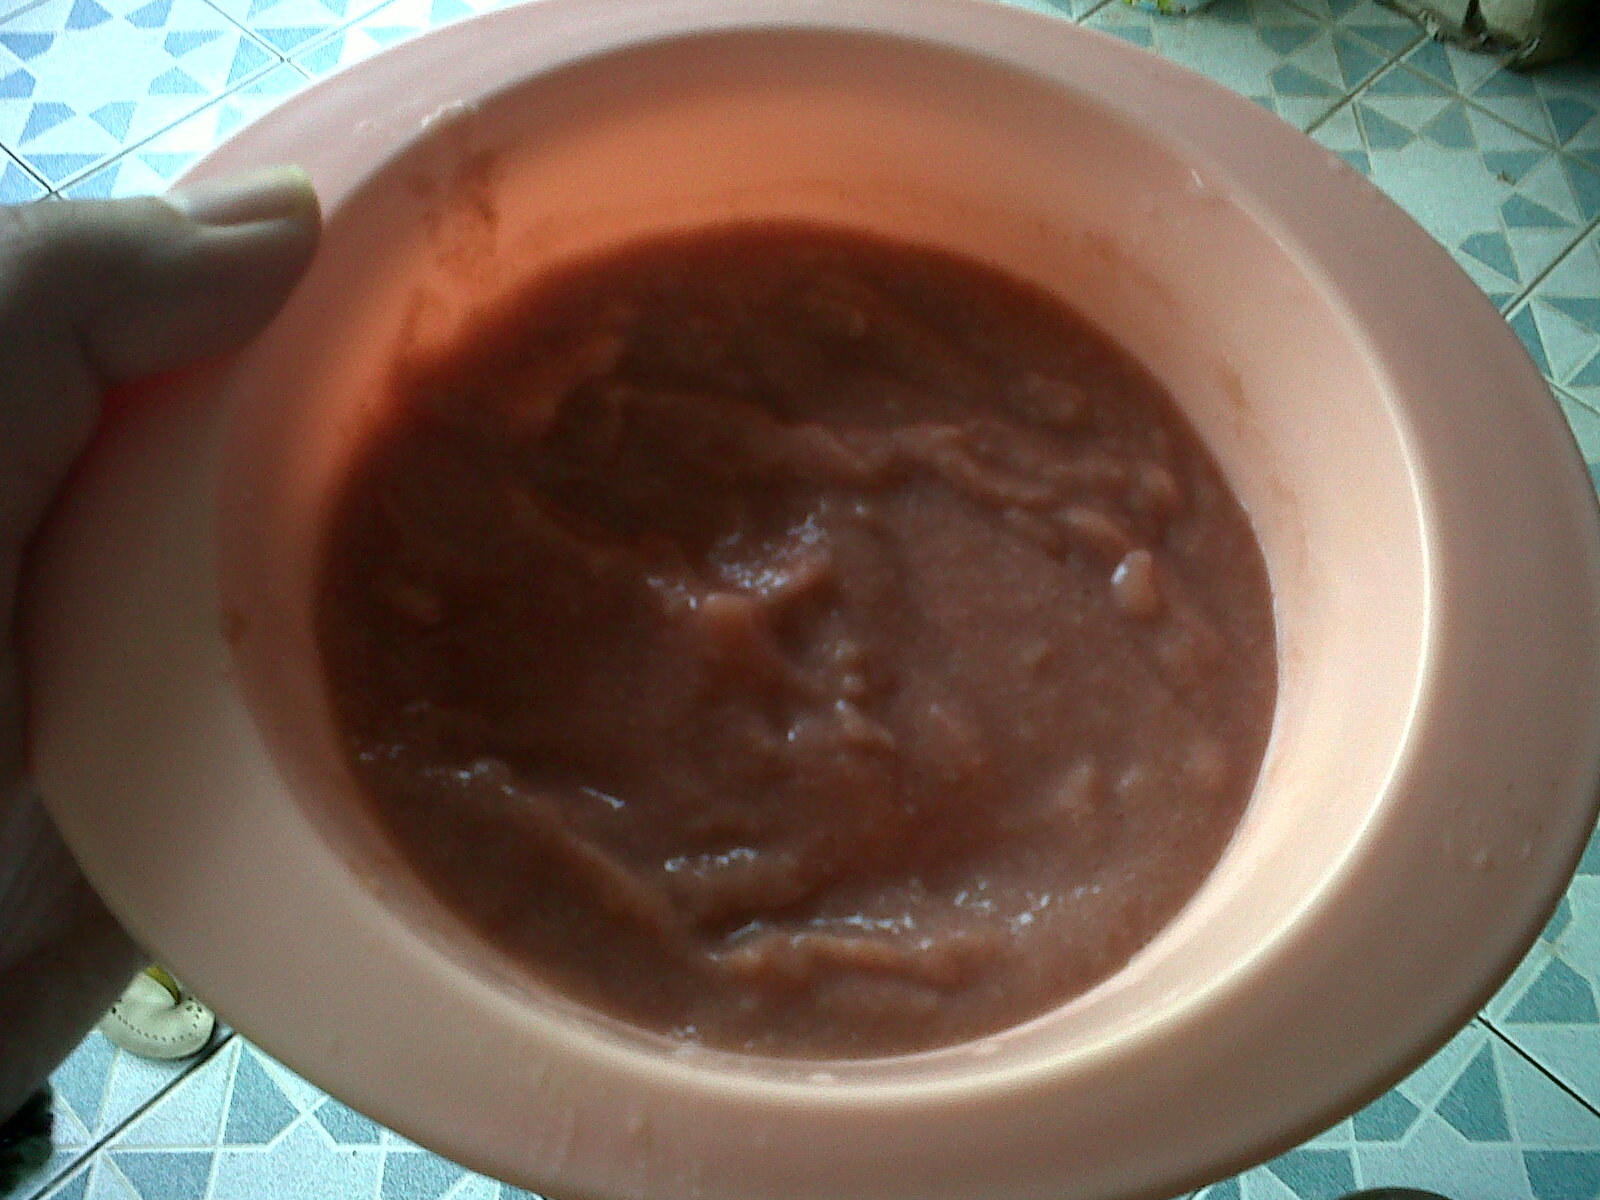
awal mpasi azumie bunda kasi puree buah,sayur dan tepung beras
Resep Kaldu ayam/sapi
1 liter air
1/2 kg ayam/sapi
caranya:rebus air hingga mendidih masukan ayam/sapi masak hingga matang setelah masak saring dan ambil airnya simpa di ice cub
PUREE PEPAYA
100 gr pepaya
100 cc asip/air matang
caranya:saring pepaya lalu campur dengan asip atau air

PUREE PIR HIJAU
1 buah pir hijau kupas kulitnya
100 cc asip/air matang
caranya:blender pir lalu campur dengan asip atau air

PUREE ALPUKAT
1 buah avocad mentega
150 cc asip/air
caranya;saring avocad lalu campur dengan asip/air

PUREE APEL
1 Buah apel merah yg manis icip dulu lalu kukus
100 cc asip/air
caranya:saring apel kukus campur dgn asip atau air
SWEET PIR KABOCHA PUREE
100 gr kabocha kukus
100 cc asip
1 Buah pir hijau
caranya:campur dan blender semua bahan
MASHED POTATO WITH APPLE PUREE
1 buah kentang kukus
1/2 buah apel kukus
150 cc asip/air
caranya:blender semua bahan campur dgn asip/ air matang

BUBUR SUSU UBI UNGU
100 gr ubi ungu kupas kukus
100 cc air matang
50 cc asip(asi perah)
caranya:haluskan ubi kukus lalu campur dengan air dan siram asip

BUBUR SUSU BERAS MERAH
1 sdm tepung beras merah organik aku pke gasol
100 cc air matang
100 cc asip
caranya:masak tepung beras dengan air aduk hingga tercampur dan mengental setelah masak campur dengan asip

PUREE ZUCCHINI
1 buah zucchini kukus dan blender ngak perlu tambahin air dah encer bgt,hihi
SWEET CORN PUREE
1 buah jagung ampil pipilnya lalu rebus
100 cc asip/air matang
caranya:blender semua bahan

MIX VEGE PUREE
100 gr buncis baby
100 gr labu air
100 gr zucchini
50 cc asip
caanya:rebus sayur lalu blender dan campur dgn asip

BUBUR SUSU PEPAYA
1 sdm tepung beras putih organik
100 gr pepaya
100 cc air kaldu
50 cc asip
caranya:blender pepaya dan air lalu campur dengan tepung lalu masak hingga mengental setelah masak masukan asip

PUREE COKLAT
1 sdm tepung organik pisang
1/2 potong pisang ambon
1/2 potong apel
100 cc air matang
50 cc asip
caranya: blender semua bahan kec asip lalu masak dgn api ecil aduk sampai mengental campur asip

PINKY PUREE
Sekilas kaya bubur beras merah tp ini lain,hihi
1 sdm tepung kacang merah organik
1 buah jambu biji merah buang bijinya
100 cc air matang
50 cc asip
caranya:campur dan blender semua bahan kec asip lalu masak hingga mengental setelah matang campur asip…

Source : http://azumiemylilstar.wordpress.com/resep-mpasi-azumie/resep-mpasi-6-bln/

Monday, 24 February 2014

Windows Volume Activation in Cambridge

Client Configuration

Client in this case refers to any Microsoft operating system using volume activation and a KMS key, servers as well as desktop versions.
All configuration is done via a VB script (slmgr.vbs) which is installed by default on all Windows systems capable of using KMS. It is located in the Windows\system32 directory. You must use a command shell run with administrator privilages.

General Prerequisites

You need to ensure that you can communicate via TCP port 1688 to our KMS servers.
Right click on a command shell and select Run as Administrator before entering the commands.

Change the SID

Before imaging a system for use with KMS you must generate a unique SID. If you are doing a clean install from media you will get a unique SID. If you're planning on imaging systems you can use sysprep with the generalise option, the Windows Automated Installation Kit or join the system to a domain.
Once you have done this you can configure the system to use KMS for activation.

Configuration Steps

  • Set the KMS server (slmgr -skms servername)
  • Install the KMS Product Key (slmgr -ipk product key)
  • Activate the system (slmgr -ato)

Set the KMS Server (slmgr -skms servername)

You need to configure your client to point to the KMS server. By default it will try and autodetect an activation server using DNS and SRV records, based on the DNS domain suffix of the client. Since these records would not match in the majority of cases this is not a viable method for us so direct registration of the KMS server is the supported method.
The server name is kms.csx.private.cam.ac.uk.
You should use the FQDN to identify the KMS system rather than the IP address or NetBIOS name.
To configure the client for direct registration launch a command window with elevated privileges and enter:
 \windows\system32\slmgr.vbs -skms kms.csx.private.cam.ac.uk
This will override any attempt by the client to use autodiscovery and point the system to the central KMS server.

Install the KMS Product Key (slmgr -ipk product key)

On Windows Vista, server 2003, 2003 R2 and 2008 the product key can be found in a pid.txt file in the \Sources folder on the install media. Windows 7 and Server 2008 R2 product keys can be found below. This may cause an error message, see Troubleshooting below.
To install a product key use slmgr.vbs
\windows\system32\slmgr.vbs -ipk Product Key
If a pre-existing key is present you may need to use the -upk option to remove this before you can install the pid key.

Windows 7, 8, Server 2008 R2 and Server 2012 use the following keys for KMS activation;

Operating System Edition Product Key
Windows 8.1
Windows 8.1 Professional GCRJD-8NW9H-F2CDX-CCM8D-9D6T9
Windows 8.1 Professional N HMCNV-VVBFX-7HMBH-CTY9B-B4FXY
Windows 8.1 Enterprise MHF9N-XY6XB-WVXMC-BTDCT-MKKG7
Windows 8.1 Enterprise N TT4HM-HN7YT-62K67-RGRQJ-JFFXW
Windows 8
Windows 8 Professional NG4HW-VH26C-733KW-K6F98-J8CK4
Windows 8 Professional N XCVCF-2NXM9-723PB-MHCB7-2RYQQ
Windows 8 Enterprise 32JNW-9KQ84-P47T8-D8GGY-CWCK7
Windows 8 Enterprise N JMNMF-RHW7P-DMY6X-RF3DR-X2BQT
Windows 7
Windows 7 Professional FJ82H-XT6CR-J8D7P-XQJJ2-GPDD4
Windows 7 Professional N MRPKT-YTG23-K7D7T-X2JMM-QY7MG
Windows 7 Enterprise 33PXH-7Y6KF-2VJC9-XBBR8-HVTHH
Windows 7 Enterprise N YDRBP-3D83W-TY26F-D46B2-XCKRJ
Windows 7 Enterprise E C29WB-22CC8-VJ326-GHFJW-H9DH4
Windows Server 2012 R2
Windows Server 2012 R2 Server Standard D2N9P-3P6X9-2R39C-7RTCD-MDVJX
Windows Server 2012 R2 Datacenter W3GGN-FT8W3-Y4M27-J84CP-Q3VJ9
Windows Server 2012 R2 Essentials KNC87-3J2TX-XB4WP-VCPJV-M4FWM
Windows Server 2012
Windows Server 2012 Core BN3D2-R7TKB-3YPBD-8DRP2-27GG4
Windows Server 2012 Core N 8N2M2-HWPGY-7PGT9-HGDD8-GVGGY
Windows Server 2012 Core Single Language 2WN2H-YGCQR-KFX6K-CD6TF-84YXQ
Windows Server 2012 Core Country Specific 4K36P-JN4VD-GDC6V-KDT89-DYFKP
Windows Server 2012 Server Standard XC9B7-NBPP2-83J2H-RHMBY-92BT4
Windows Server 2012 Standard Core XC9B7-NBPP2-83J2H-RHMBY-92BT4
Windows Server 2012 Multipoint Standard HM7DN-YVMH3-46JC3-XYTG7-CYQJJ
Windows Server 2012 Multipoint Premium XNH6W-2V9GX-RGJ4K-Y8X6F-QGJ2G
Windows Server 2012 Datacenter 48HP8-DN98B-MYWDG-T2DCC-8W83P
Windows Server 2012 Datacenter Core 48HP8-DN98B-MYWDG-T2DCC-8W83P
Windows Server 2008 R2
Windows Server 2008 R2 HPC Edition FKJQ8-TMCVP-FRMR7-4WR42-3JCD7
Windows Server 2008 R2 Datacenter 74YFP-3QFB3-KQT8W-PMXWJ-7M648
Windows Server 2008 R2 Enterprise 489J6-VHDMP-X63PK-3K798-CPX3Y
Windows Server 2008 R2 for Itanium-Based Systems GT63C-RJFQ3-4GMB6-BRFB9-CB83V
Windows Server 2008 R2 Standard YC6KT-GKW9T-YTKYR-T4X34-R7VHC
4GGC4-9947F-FWFP3-78P6F-J9HDR
Windows Web Server 2008 R2 6TPJF-RBVHG-WBW2R-86QPH-6RTM4

Activate The System (slmgr -ato)

KMS clients will automatically attempt to contact the KMS server every two hours to activate.
You can force a client to activate the following slmgr.vbs switch.
  slmgr.vbs -ato
  

 Windows 10

Windows 10 has the KMS key built in.
Use step 1 (to set the KMS server to kms.csx.private.cam.ac.uk)

 \windows\system32\slmgr.vbs -skms kms.csx.private.cam.ac.uk
 
and step 3 (activating the product using -ato)

  slmgr.vbs -ato

Checking The License Status

Checking The License Status

Viewing the system properties should tell you if the system is activated or not. You can also use slmgr -dlv to view detailed licensing status of a system.

Converting clients from MAK to KMS licensing/Issues with KMS

You need to tell Windows that it is going to activate using KMS rather than MAK. When you buy a copy of Windows from software sales you will get a MAK key as part of the paperwork, this is not the one to use. Every Vista and Server 2008 (non R2) volume license media has a pid.txt file found under \Sources. This contains the KMS key. Alternative KMS keys can be found in the Volume Activation Technical Reference, for links look at the end of the page.

Troubleshooting

For Server 2008 when using the pid key from the \Sources\pid.txt file you may see the following error after adding the key with -ipk
  • Run Slui.exe 0x2a 0xC004F015 to display error text
  • Error 0xC004F015
This error can be ignored. Run Slmgr -ato and the system should activate.
When using the commands above, you may get errors such as '0x800706BA The RPC server is unavailable' (which may indicate a network error but is often displayed as an unhelpful generic error message) or 'Error 0x800706BA occurred in connecting to server -ipk'. The following three points should be noted:
  • Check that you are logged in as an Administrator running an Administrative command prompt
  • In the cscript command itself try using a / instead of -
  • If the error is with the -skms command it may indicate a network error (failure to communicate on port TCP 1688 - due to this you cannot activate via Lapwing and may get error 0x4004F00C)
For a more detailed list of error codes and possible causes see Microsoft's How to troubleshoot Volume Activation error codes on Windows Server 2008 and Windows Vista-based computers at http://support.microsoft.com/kb/938450.

Source : http://www.ucs.cam.ac.uk/support/windows-support/winsuptech/volact/windowsva

Thursday, 13 February 2014

Nagios 4.0.1 Released – Install on RHEL/CentOS 6.x/5.x and Fedora 19/18/17

Nagios is an awesome Open Source monitoring tool, its provides you more comprehensive monitoring environment to always keep an eye on your all machines / networks whether you are in a your data center or just your small labs.
With Nagios, you can monitor your remote hosts and their services remotely on a single window. It shows warnings and indicates if something goes wrong in your servers which eventually helps us to detect some problems before they occur. It helps us to reduce downtime and business losses.
Recently, Nagios released its latest versions Nagios 4.0.1 on 15th October 2013, and its latest stable release of Nagios plugins 1.5.
This article is intended to guide you with easy instructions on how to install latest Nagios 4.0.1 from source (tarball) on RHEL 6.4/6.3/6.2/6.1/6/5.8, CentOS 6.4/6.3/6.2/6.1/6/5.8 and Fedora 19,18,17,16,15,14,13,12 distributions. Within 30 minutes you will be monitoring your local machine, no any advanced installation procedure only basic installation that will work 100% on most of the today’s Linux servers.
Please Note: The installation instructions were shown in here are written based on CentOS 6.4 Linux distribution.

Installing Nagios 4.0.1 and Nagios Plugin 1.5

If you follow these instructions correctly, you will end up with following information.
  1. Nagios and its plugins will be installed under /usr/local/nagios directory.
  2. Nagios will be configured to monitor few services of your local machine (Disk Usage, CPU Load, Current Users, Total Processes, etc.)
  3. Nagios web interface will be available at http://localhost/nagios

Step 1: Install Required Dependencies

We need to install Apache, PHP and some libraries like gcc, glibc, glibc-common and GD libraries and its development libraries before installing Nagios 4.0.1 with source. And to do so we can use yum default package installer.
[root@tecmint]# yum install -y httpd php gcc glibc glibc-common gd gd-devel make net-snmp  (RedHat / CentOS)

Step 2: Create Nagios User and Group

Create a new nagios user and nagcmd group account and set a password.
[root@tecmint]# useradd nagios
[root@tecmint]# groupadd nagcmd
Next, add both the nagios user and the apache user to the nagcmd group.
[root@tecmint]# usermod -G nagcmd nagios
[root@tecmint]# usermod -G nagcmd apache

Step 3: Download Nagios Core 4.0.1 and Nagios Plugin 1.5

Create a directory for your Nagios installation and all its future downloads.
[root@tecmint]# mkdir /root/nagios
[root@tecmint]# cd /root/nagios
Now download latest Nagios Core 4.0.1 and Nagios plugins 1.5 packages with wget command.
[root@tecmint nagios~]# wget http://prdownloads.sourceforge.net/sourceforge/nagios/nagios-4.0.1.tar.gz
[root@tecmint nagios~]# wget https://www.nagios-plugins.org/download/nagios-plugins-1.5.tar.gz

Step 4: Extract Nagios Core and its Plugins

We need to extract downloaded package with tar command as follows.
[root@tecmint nagios~]# tar –xvf nagios-4.0.1.tar.gz
[root@tecmint nagios~]# tar –xvf nagios-plugins-1.5.tar.gz
When you extract these tarballs with tar command, two new folders will appear in that directory.
[root@tecmint nagios ~]# ll
total 3712
drwxrwxr-x 18 root root    4096 Oct 17 03:28 nagios-4.0.1
-rw-r--r--  1 root root 1695367 Oct 15 19:49 nagios-4.0.1.tar.gz
drwxr-xr-x 15  200  300    4096 Oct 14 10:18 nagios-plugins-1.5
-rw-r--r--  1 root root 2428258 Oct  2 11:27 nagios-plugins-1.5.tar.gz

Configure Nagios Core

Now, first we will configure Nagios Core and to do so we need to go to Nagios directory and run configure file and if everything goes fine, it will show the output in the end as sample output. Please see below.
[root@tecmint nagios~]# cd nagios-4.0.1
[root@tecmint nagios-4.0.1 ]# ./configure --with-command-group=nagcmd
Sample output:
Nagios executable:  nagios
        Nagios user/group:  nagios,nagios
       Command user/group:  nagios,nagcmd
             Event Broker:  yes
        Install ${prefix}:  /usr/local/nagios
    Install ${includedir}:  /usr/local/nagios/include/nagios
                Lock file:  ${prefix}/var/nagios.lock
   Check result directory:  ${prefix}/var/spool/checkresults
           Init directory:  /etc/rc.d/init.d
  Apache conf.d directory:  /etc/httpd/conf.d
             Mail program:  /bin/mail
                  Host OS:  linux-gnu

 Web Interface Options:
 ------------------------
                 HTML URL:  http://localhost/nagios/
                  CGI URL:  http://localhost/nagios/cgi-bin/
 Traceroute (used by WAP):  /bin/traceroute

Review the options above for accuracy.  If they look okay,
type 'make all' to compile the main program and CGIs.
Now, after configuring we need to Compile and install all the binaries with make command and make install command will install all the needed libraries in your machine and we can proceed further.
[root@tecmint nagios-4.0.1 ]# make all
[root@tecmint nagios-4.0.1 ]# make install
Sample output:
*** Main program, CGIs and HTML files installed ***

You can continue with installing Nagios as follows (type 'make'
without any arguments for a list of all possible options):

  make install-init
     - This installs the init script in /etc/rc.d/init.d

  make install-commandmode
     - This installs and configures permissions on the
       directory for holding the external command file

  make install-config
     - This installs sample config files in /usr/local/nagios/etc
Following command will install the init scripts for Nagios.
[root@tecmint nagios-4.0.1 ]# make install-init
To make nagios work from command line we need to install command-mode.
[root@tecmint nagios-4.0.1 ]# make install-commandmode
Next, install sample nagios files, please run following command.
[root@tecmint nagios-4.0.1 ]# make install-config
Sample output:
/usr/bin/install -c -m 775 -o nagios -g nagios -d /usr/local/nagios/etc
/usr/bin/install -c -m 775 -o nagios -g nagios -d /usr/local/nagios/etc/objects
/usr/bin/install -c -b -m 664 -o nagios -g nagios sample-config/nagios.cfg /usr/local/nagios/etc/nagios.cfg
/usr/bin/install -c -b -m 664 -o nagios -g nagios sample-config/cgi.cfg /usr/local/nagios/etc/cgi.cfg
/usr/bin/install -c -b -m 660 -o nagios -g nagios sample-config/resource.cfg /usr/local/nagios/etc/resource.cfg
/usr/bin/install -c -b -m 664 -o nagios -g nagios sample-config/template-object/templates.cfg /usr/local/nagios/etc/objects/templates.cfg
/usr/bin/install -c -b -m 664 -o nagios -g nagios sample-config/template-object/commands.cfg /usr/local/nagios/etc/objects/commands.cfg
/usr/bin/install -c -b -m 664 -o nagios -g nagios sample-config/template-object/contacts.cfg /usr/local/nagios/etc/objects/contacts.cfg
/usr/bin/install -c -b -m 664 -o nagios -g nagios sample-config/template-object/timeperiods.cfg /usr/local/nagios/etc/objects/timeperiods.cfg
/usr/bin/install -c -b -m 664 -o nagios -g nagios sample-config/template-object/localhost.cfg /usr/local/nagios/etc/objects/localhost.cfg
/usr/bin/install -c -b -m 664 -o nagios -g nagios sample-config/template-object/windows.cfg /usr/local/nagios/etc/objects/windows.cfg
/usr/bin/install -c -b -m 664 -o nagios -g nagios sample-config/template-object/printer.cfg /usr/local/nagios/etc/objects/printer.cfg
/usr/bin/install -c -b -m 664 -o nagios -g nagios sample-config/template-object/switch.cfg /usr/local/nagios/etc/objects/switch.cfg

*** Config files installed ***

Remember, these are *SAMPLE* config files.  You'll need to read
the documentation for more information on how to actually define
services, hosts, etc. to fit your particular needs.

Step 5: Customizing Nagios Configuration

Open the “contacts.cfg” file with your choice of editor and set the email address associated with the nagiosadmin contact definition to receiving email alerts.
# vi /usr/local/nagios/etc/objects/contacts.cfg
Sample Output
###############################################################################
###############################################################################
#
# CONTACTS
#
###############################################################################
###############################################################################

# Just one contact defined by default - the Nagios admin (that's you)
# This contact definition inherits a lot of default values from the 'generic-contact'
# template which is defined elsewhere.

define contact{
       contact_name                    nagiosadmin             ; Short name of user
       use                             generic-contact         ; Inherit default values from generic-contact template (defined above)
       alias                           Nagios Admin            ; Full name of user

       email                           tecmint@tecmint.com     ; *** CHANGE THIS TO YOUR EMAIL ADDRESS ****
       }

Step 6: Install and Configure Web Interface for Nagios

We are done with all configuration in the backend, now we will configure Web Interface For Nagios with following command. The below command will Configure Web interface for Nagios and a web admin user will be created “nagiosadmin”.
[root@tecmint nagios-4.0.1 ]# make install-webconf
In this step, we will be creating a password for “nagiosadmin”. After executing this command, please provide a password twice and keep it remember because this password will be used when you login in the Nagios Web interface.
[root@tecmint nagios-4.0.1]# htpasswd -s -c /usr/local/nagios/etc/htpasswd.users nagiosadmin
New password:
Re-type new password:
Adding password for user nagiosadmin
Restart Apache to make the new settings take effect.
[root@tecmint ]# service httpd start (On RedHat / CentOS)
[root@tecmint ]# systemctl start httpd.service (On Fedora)

Step 7: Compile and Install Nagios Plugin

We have downloaded nagios plugins in /root/nagios, Go there and configure and install it as directed below.
[root@tecmint nagios]# cd /root/nagios
[root@tecmint nagios]# cd nagios-plugins-1.5
[root@tecmint nagios]# ./configure --with-nagios-user=nagios --with-nagios-group=nagios
[root@tecmint nagios]# make
[root@tecmint nagios]# make install

Step 8: Verify Nagios Configuration Files

Now we are all done with Nagios configuration and its time to verify it and to do so please insert following command. If everything goes smooth it will show up similar to below output.
[root@tecmint nagios]# /usr/local/nagios/bin/nagios -v /usr/local/nagios/etc/nagios.cfg
Sample Output
/usr/bin/install -c -m 644 sample-config/httpd.conf /etc/httpd/conf.d/nagios.conf

*** Nagios/Apache conf file installed ***

 /usr/local/nagios/bin/nagios -v /usr/local/nagios/etc/nagios.cfg
...
...
Total Warnings: 0
Total Errors:   0

Step 9: Add Nagios Services to System Startup

To make Nagios work across reboots, we need to add nagios and httpd with chkconfig command.
[root@tecmint ]# chkconfig --add nagios
[root@tecmint ]# chkconfig --level 35 nagios on
[root@tecmint ]# chkconfig --add httpd
[root@tecmint ]# chkconfig --level 35 httpd on
Restart Nagios to make the new settings take effect.
[root@tecmint ]# service nagios start (On RedHat / CentOS)
[root@tecmint ]# systemctl start nagios.service (On Fedora)

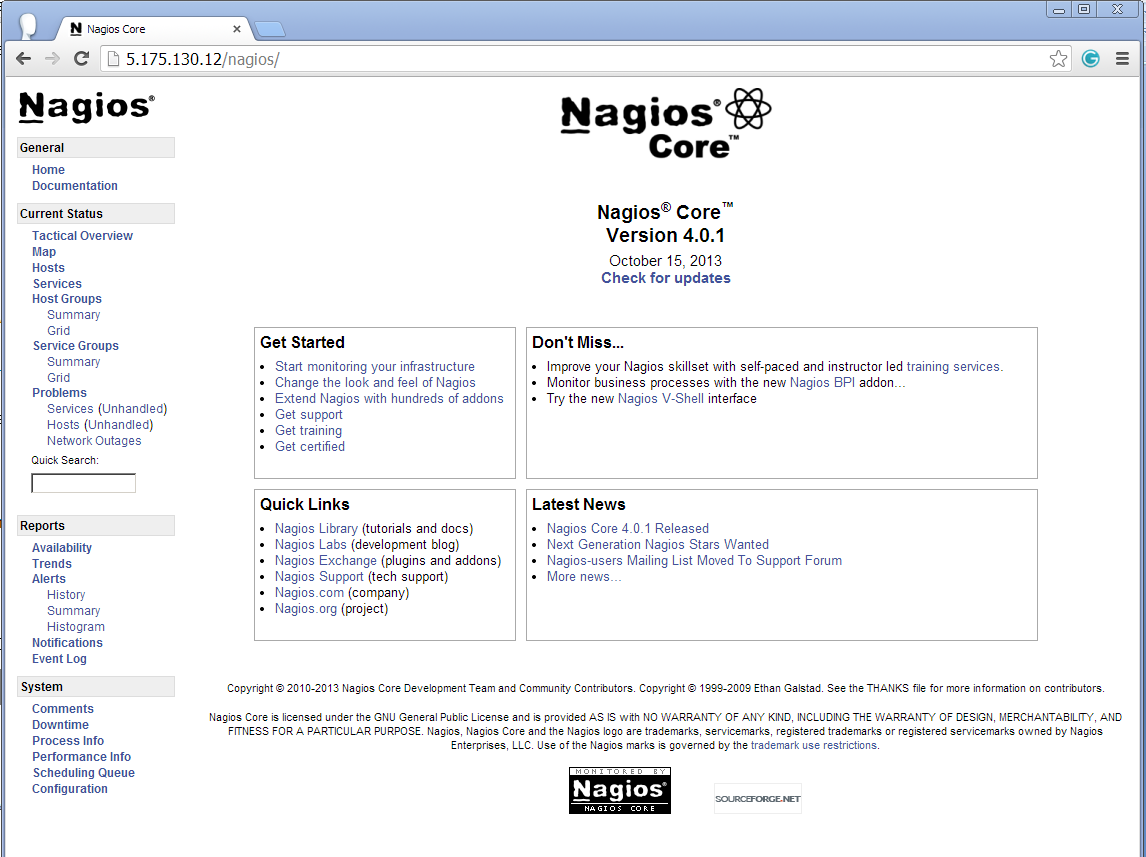
Step 10: Login to the Nagios Web Interface

Your nagios is ready to work, please open it in your browser with “http://Your-server-IP-address/nagios” or “http://FQDN/nagios” and Provide the username “nagiosadmin” and password.
Nagios Login
Nagios Login
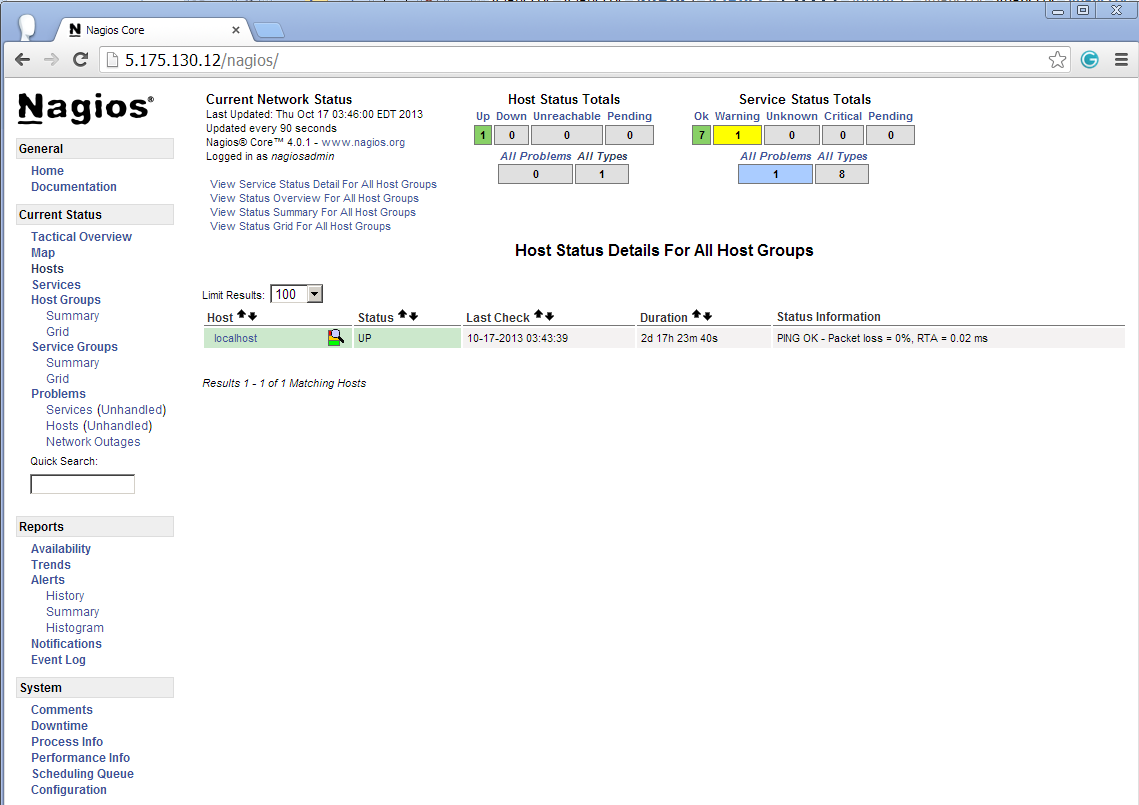
Nagios Web Interface
Host View
Nagios Host View
Nagios Host View
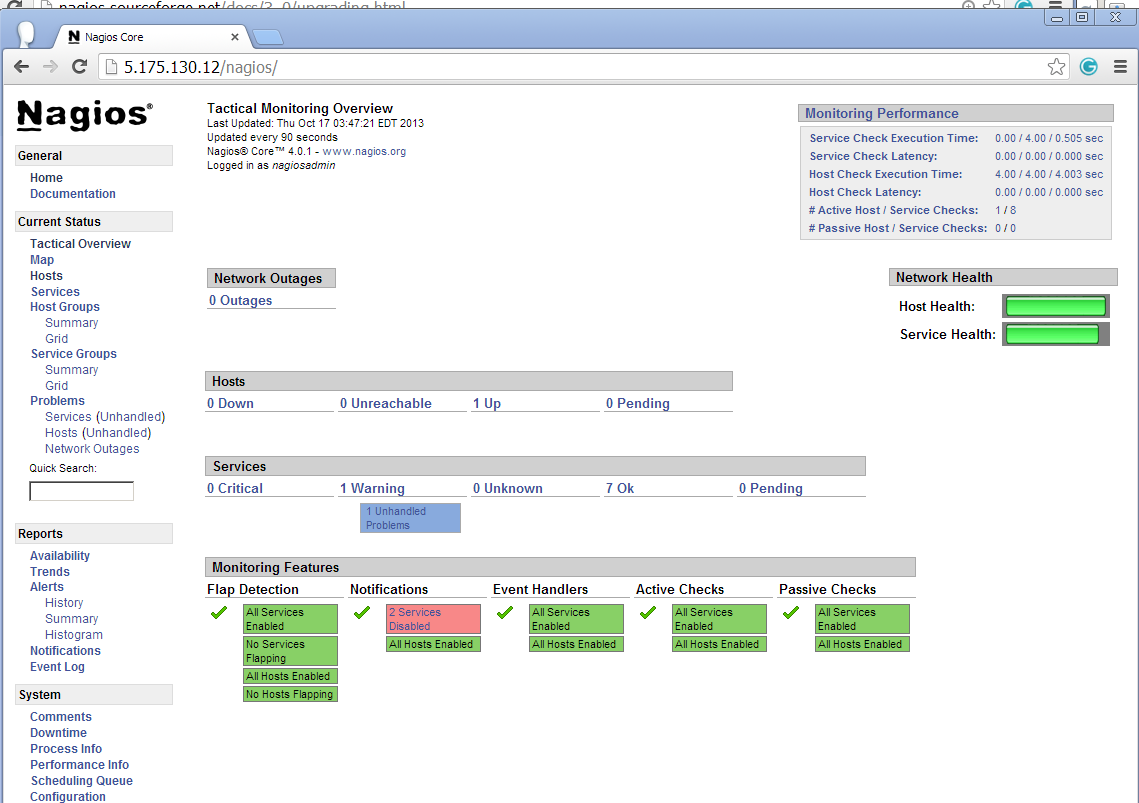
Nagios Overview
Nagios Overview
Nagios Overview
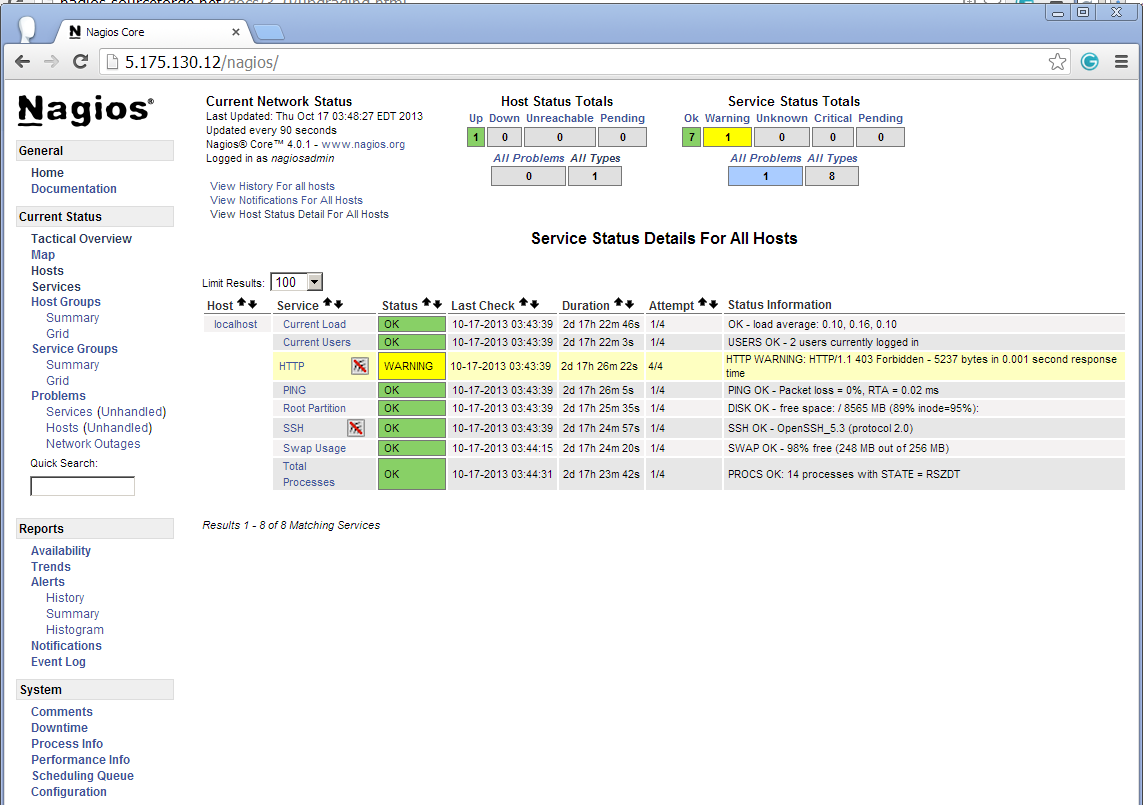
Service View
Nagios Services
Nagios View Services
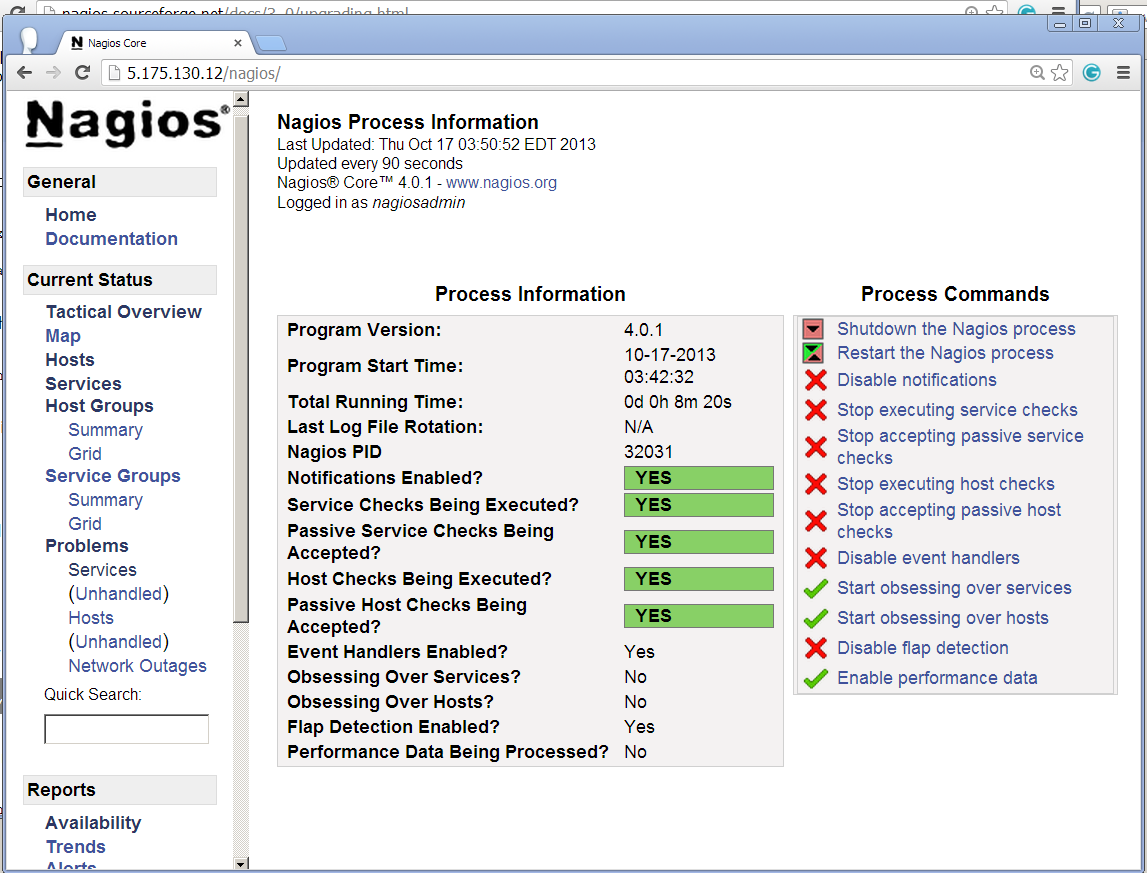
Process View
Nagios Process View
Process View
Congratulations! You’ve successfully installed and configured Nagios and its Plugins. You’ve just begin your journey into monitoring.

Upgrade Nagios 3.x to Nagios 4.0.1

If you are already running an older version of Nagios, you can upgrade it anytime. To do so, you just need to download the latest tar archive of it and configure it as shown below.
[root@tecmint ]# service nagios stop
[root@tecmint ]# tar –zxvf nagios-4.0.1.tar.gz
[root@tecmint ]# cd nagios-4.0.1
[root@tecmint ]# ./configure
[root@tecmint ]# make all
[root@tecmint ]# make install
[root@tecmint ]# service nagios start
That’s it for now, in my upcoming articles, I will show you how to add Linux, Windows, Printers, Switches and Devices to Nagios monitoring Server. If you’re having any trouble while installing, please do contact us via comments. Till then stay tuned and connected to Tecmint and don’t forget to Like and Share us to spread around.
Read Also:
  1. How to Add Linux Host to Nagios Monitoring Server
  2. How to Add Windows Host to Nagios Monitoring Server

Source : http://www.tecmint.com/install-nagios-in-linux/